Build a Relational Database Using RDS
Build a Relational Database Using RDS
1. Introduction
1.1 Key points
This lab is designed to build a relational database through RDS. RDS for MySQL is used as an example. After completing this lab, you will learn the following skills:
- Basic concepts about RDS
- How to set an RDS whitelist
- How to create an RDS database
- How to create an RDS account
- How to remotely connect to an RDS instance
- How to run simple SQL commands
1.2 Procedure
- Set up labal environment
- Set RDS whitelist
- Acquire RDS Internet address
- Create RDS account
- Create RDS database
- Log in RDS Instance and run execution
1.3 Cloud resources
- RDS instance: MySQL 5.6
- ECS instance: Ubuntu 16.04.2 LTS
1.4 Prerequisites
- An Alibaba Cloud account has been assigned automatically.
- An RDS instance has been created automatically.
1.5 Hint
If you encounter some differences between the real labal environment and the captured pictures in the lab manual, it may be caused by cloud portal version difference, which does not have a great impact on your labal experience. You can click comment to give feedback to us. We will update the document in time. Thank you for your cooperation.
2. Experiment instructions
2.1 Start the lab environment
If you have just completed a lab session, ensure you log out of your Alibaba Cloud account before starting a new lab. This prevents issues when opening a new lab session in the same browser.
Click Start Lab in the upper right corner of the page to start the lab.

Once the lab environment is set up, the system auto-deploys essential resources for your lab, such as ECS and RDS instances, Server Load Balancers, OSS buckets, etc. You'll also receive login credentials for the Alibaba Cloud Web console.
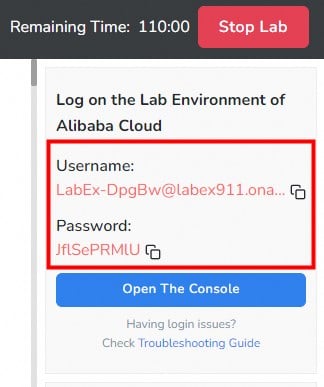
A countdown timer starts once the lab environment is ready. You have two hours to complete the lab. Pay attention to the remaining time and plan accordingly.
Next, click Open the Console to access the Alibaba Cloud RAM login page. Use the Username and Password provided by the system to log in to Alibaba Cloud and view the relevant resources.

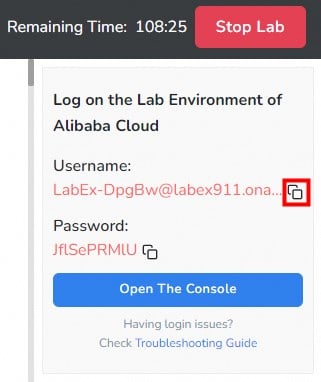
Copy and enter the provided account username and click Next.

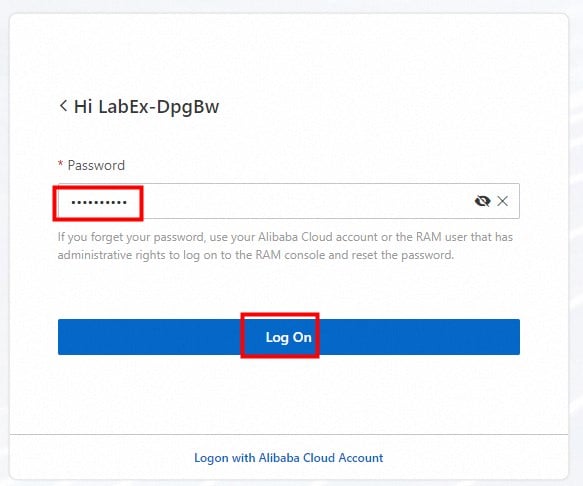
Copy and enter the provided password and click Log On.

After successfully logging in, click OK to view the main console page.


Go to the RDS management page:
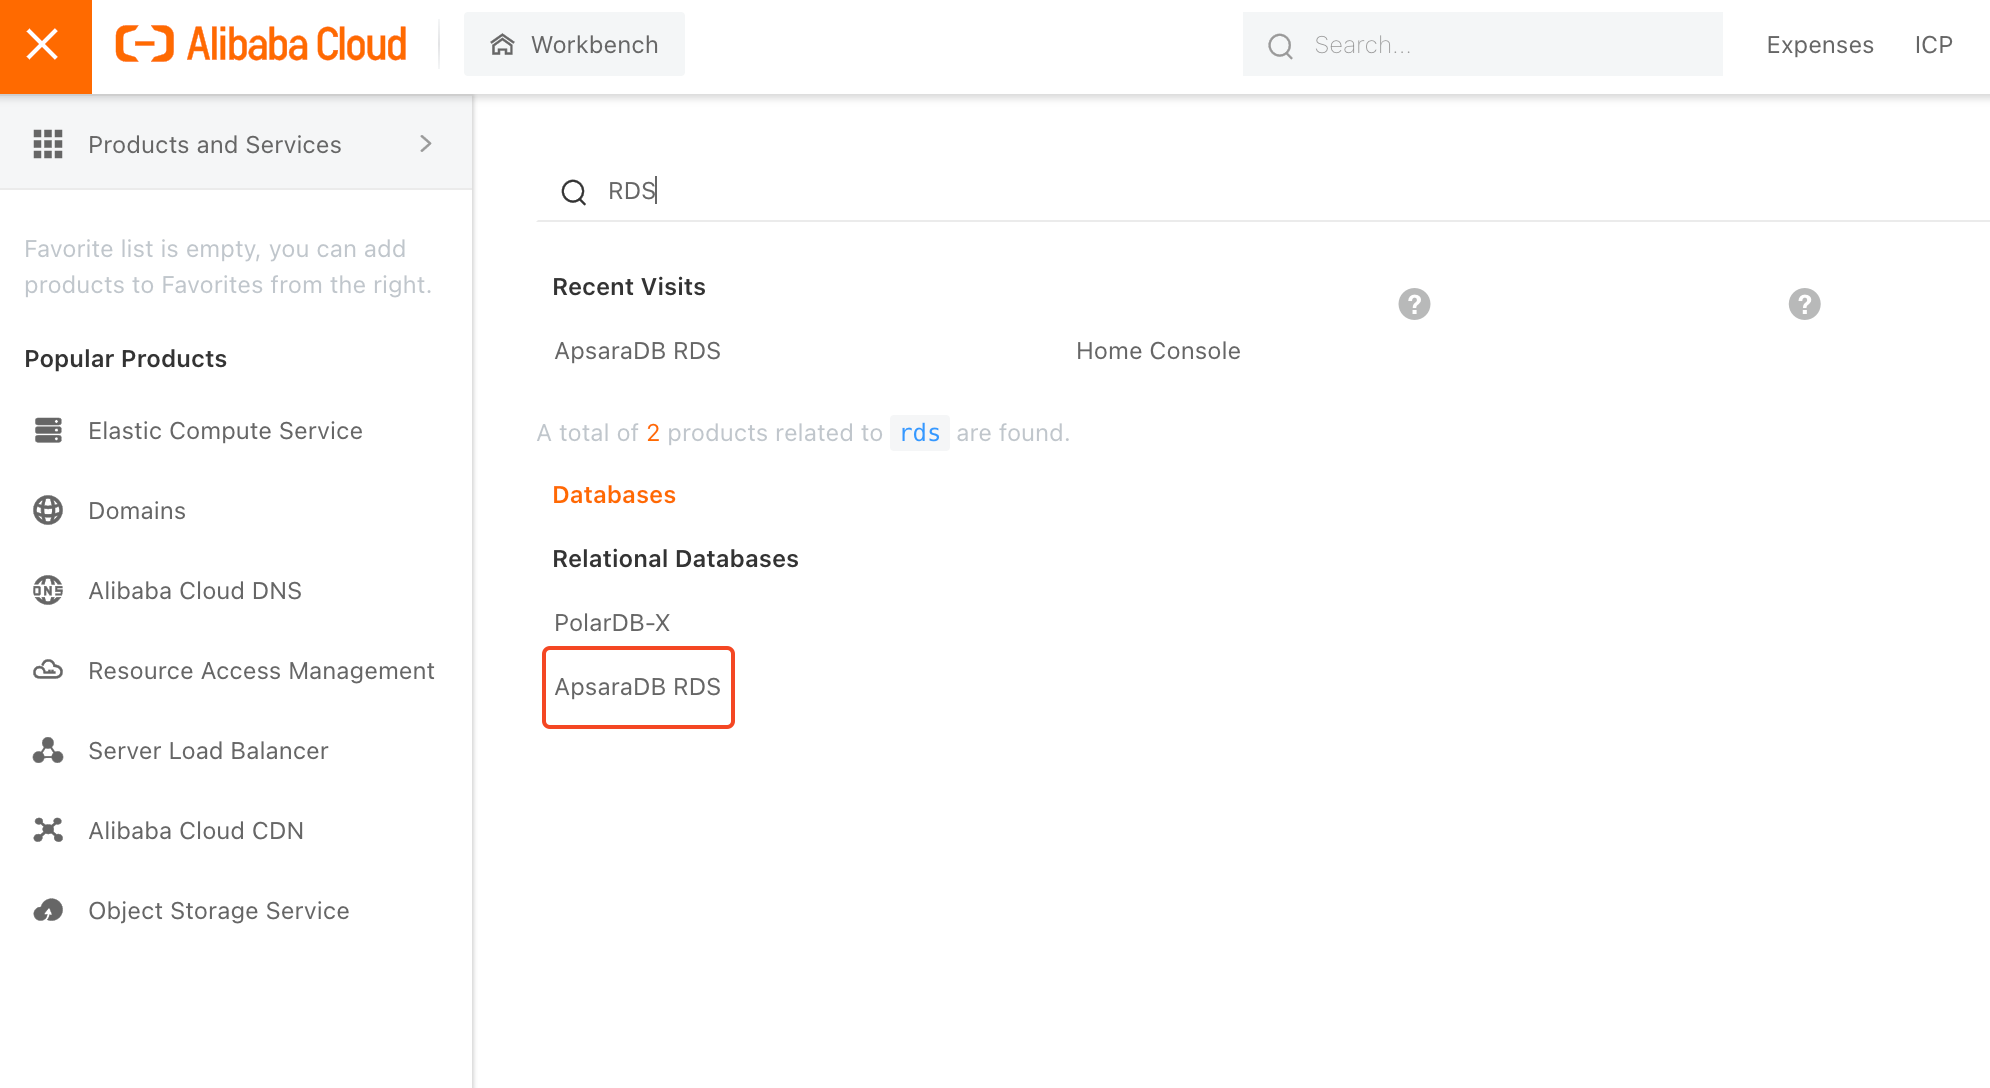
Select the US (Silicon Valley) area, you can see that an rds instance is being created, please wait a few minutes.
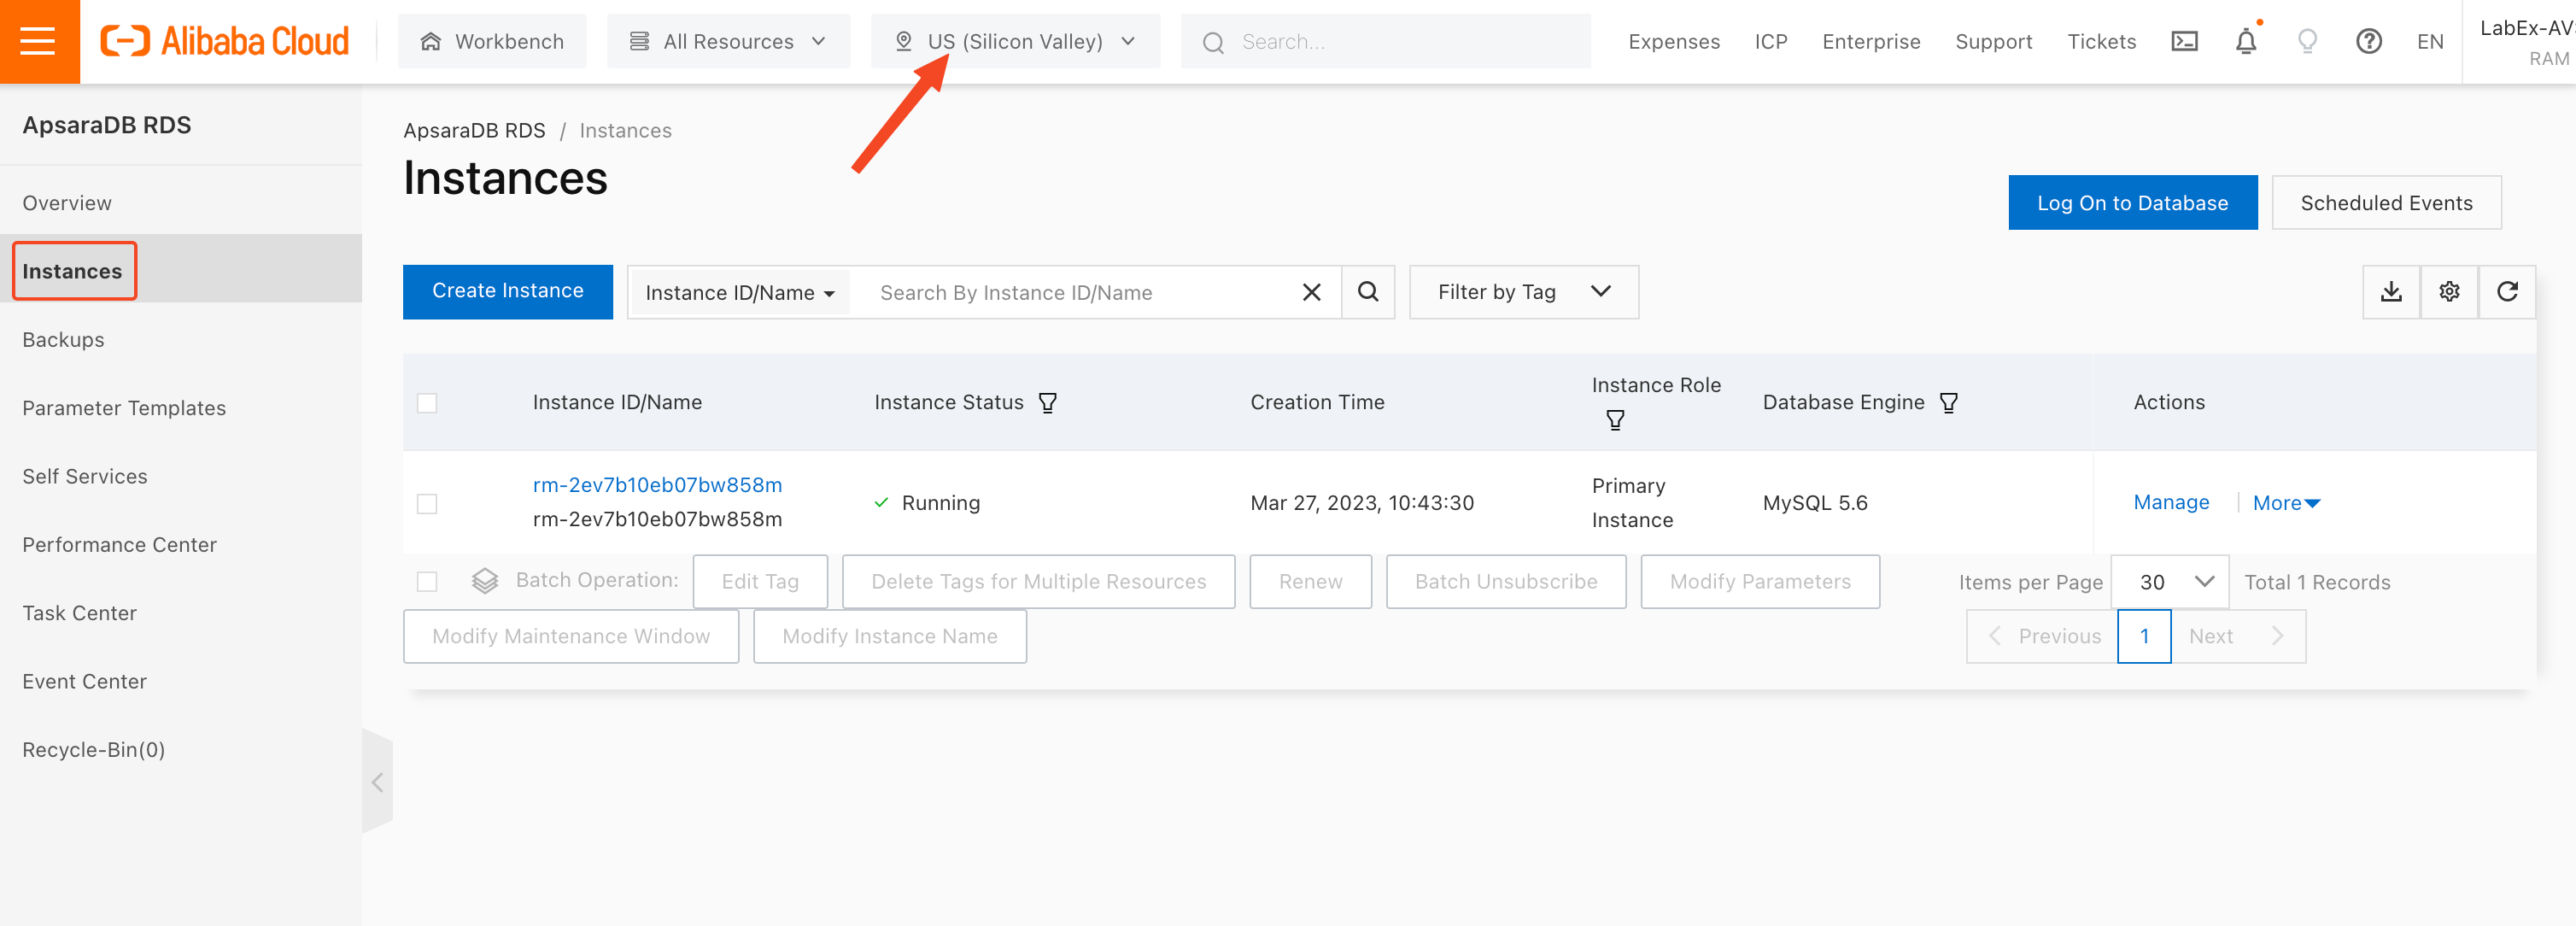
Wait until the RDS instance is successfully created.

2.2 Set a whitelist
Add the ECS intranet IP address to the RDS whitelist.

Add the IP address of the ECS instance to the RDS whitelist.
Click Create Whitelist.

Click Add Internal IP Addresses of ECS Instances.
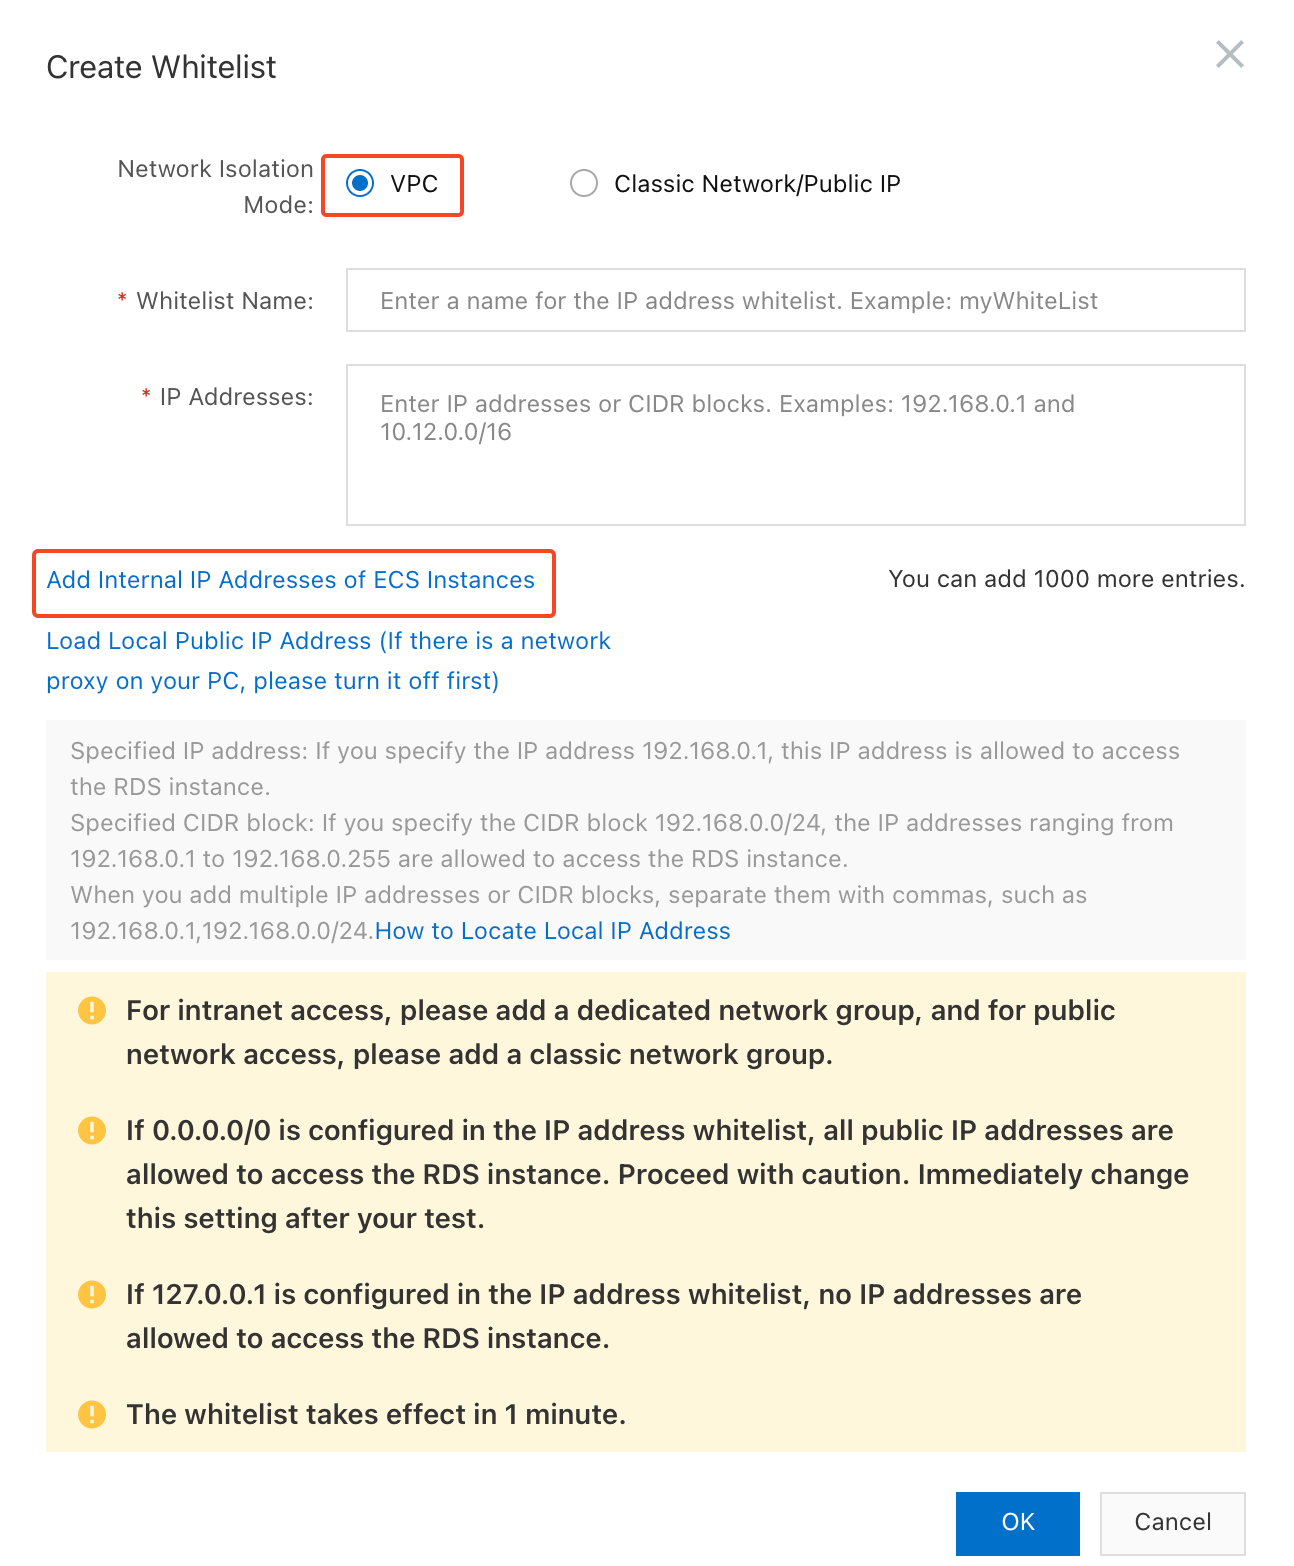
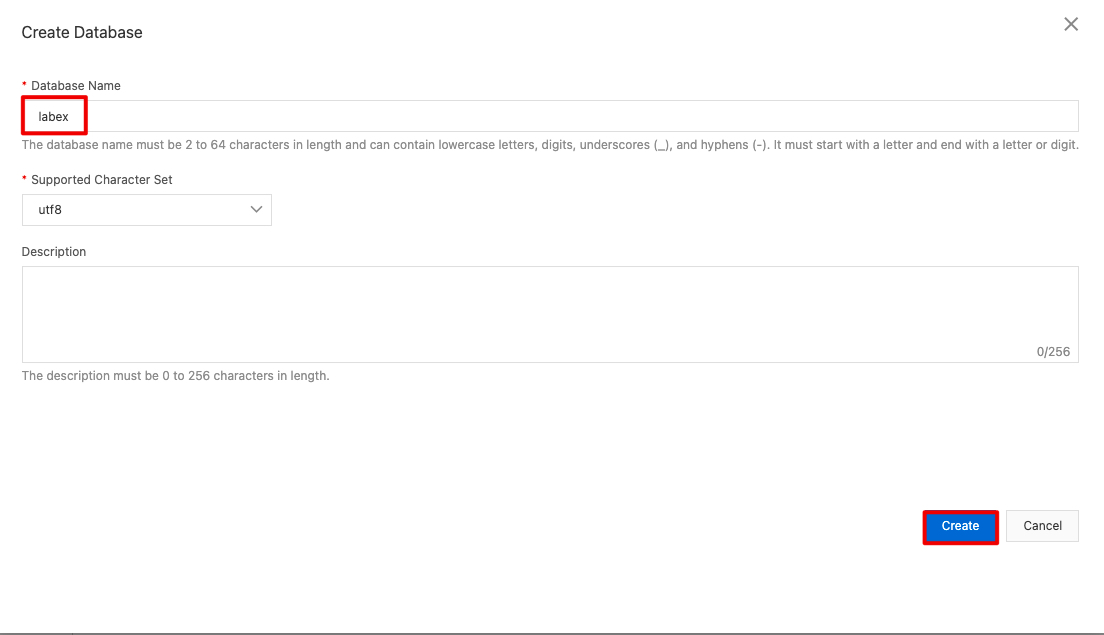
Set the name to "labex".
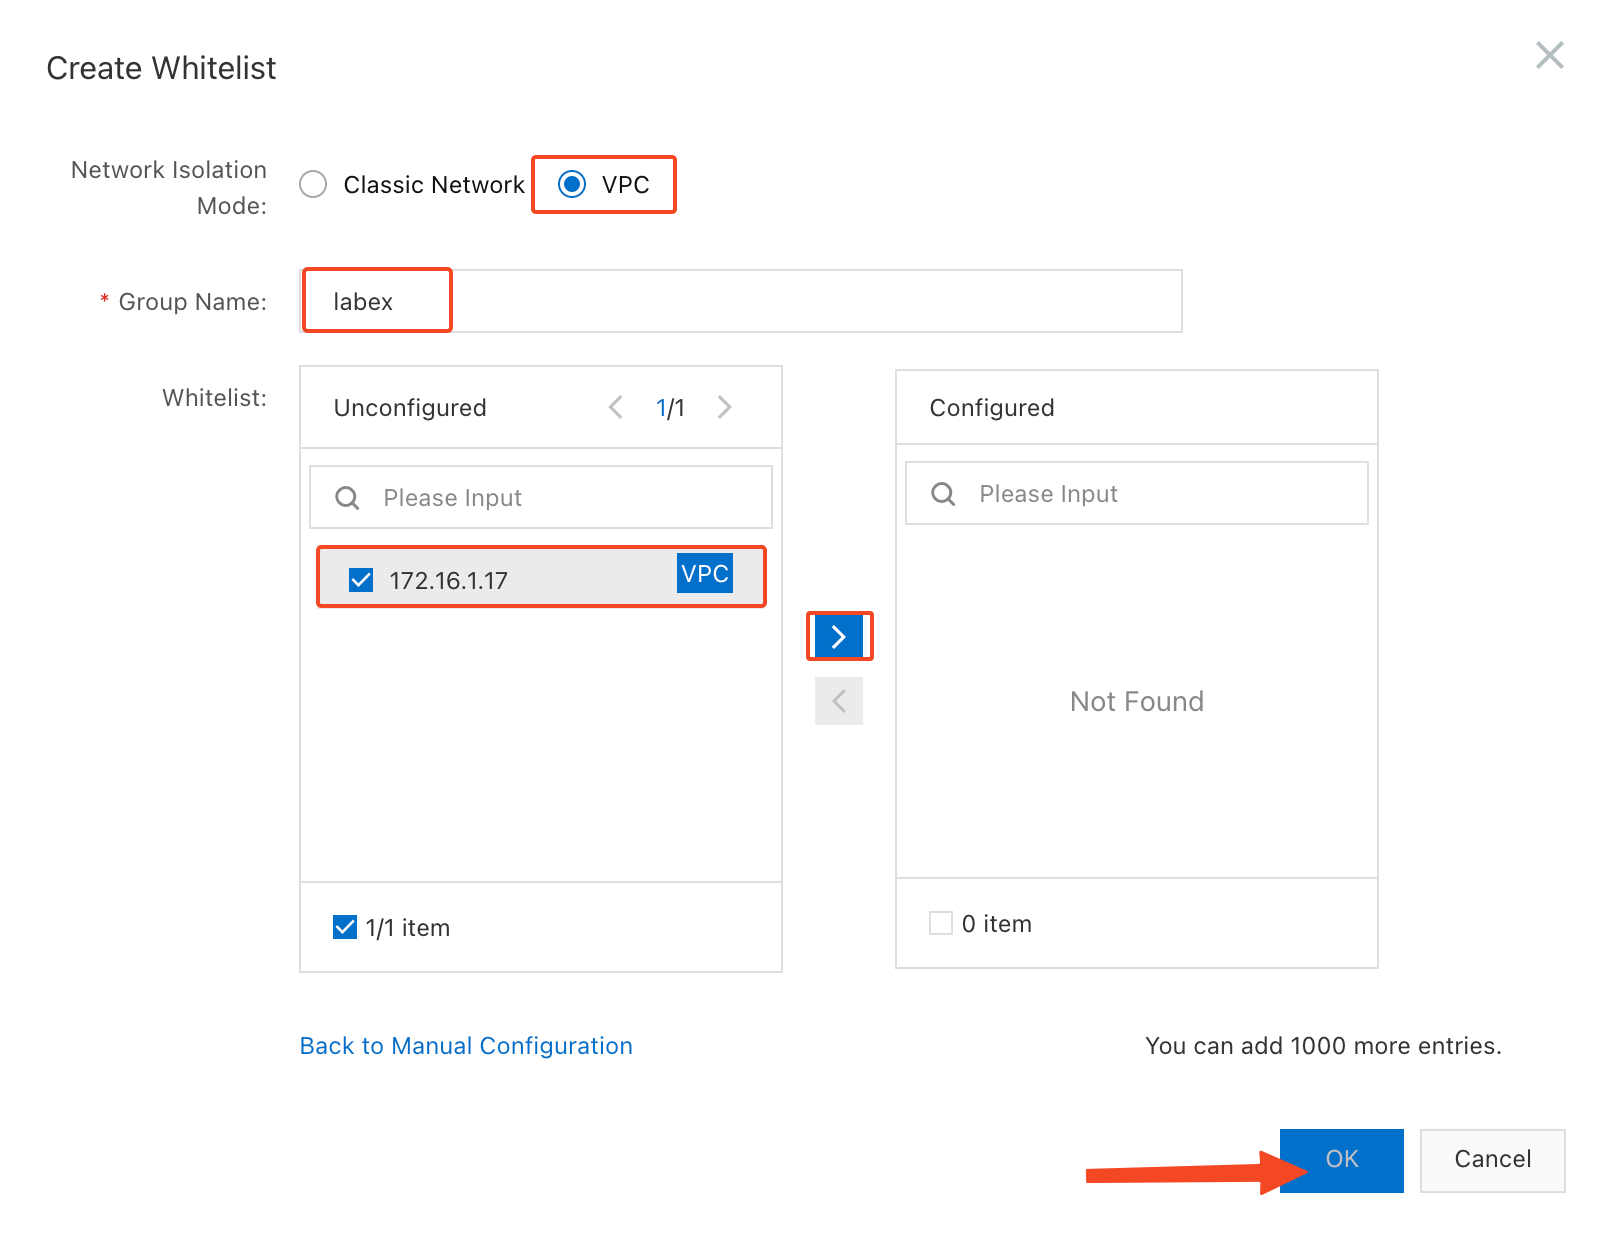
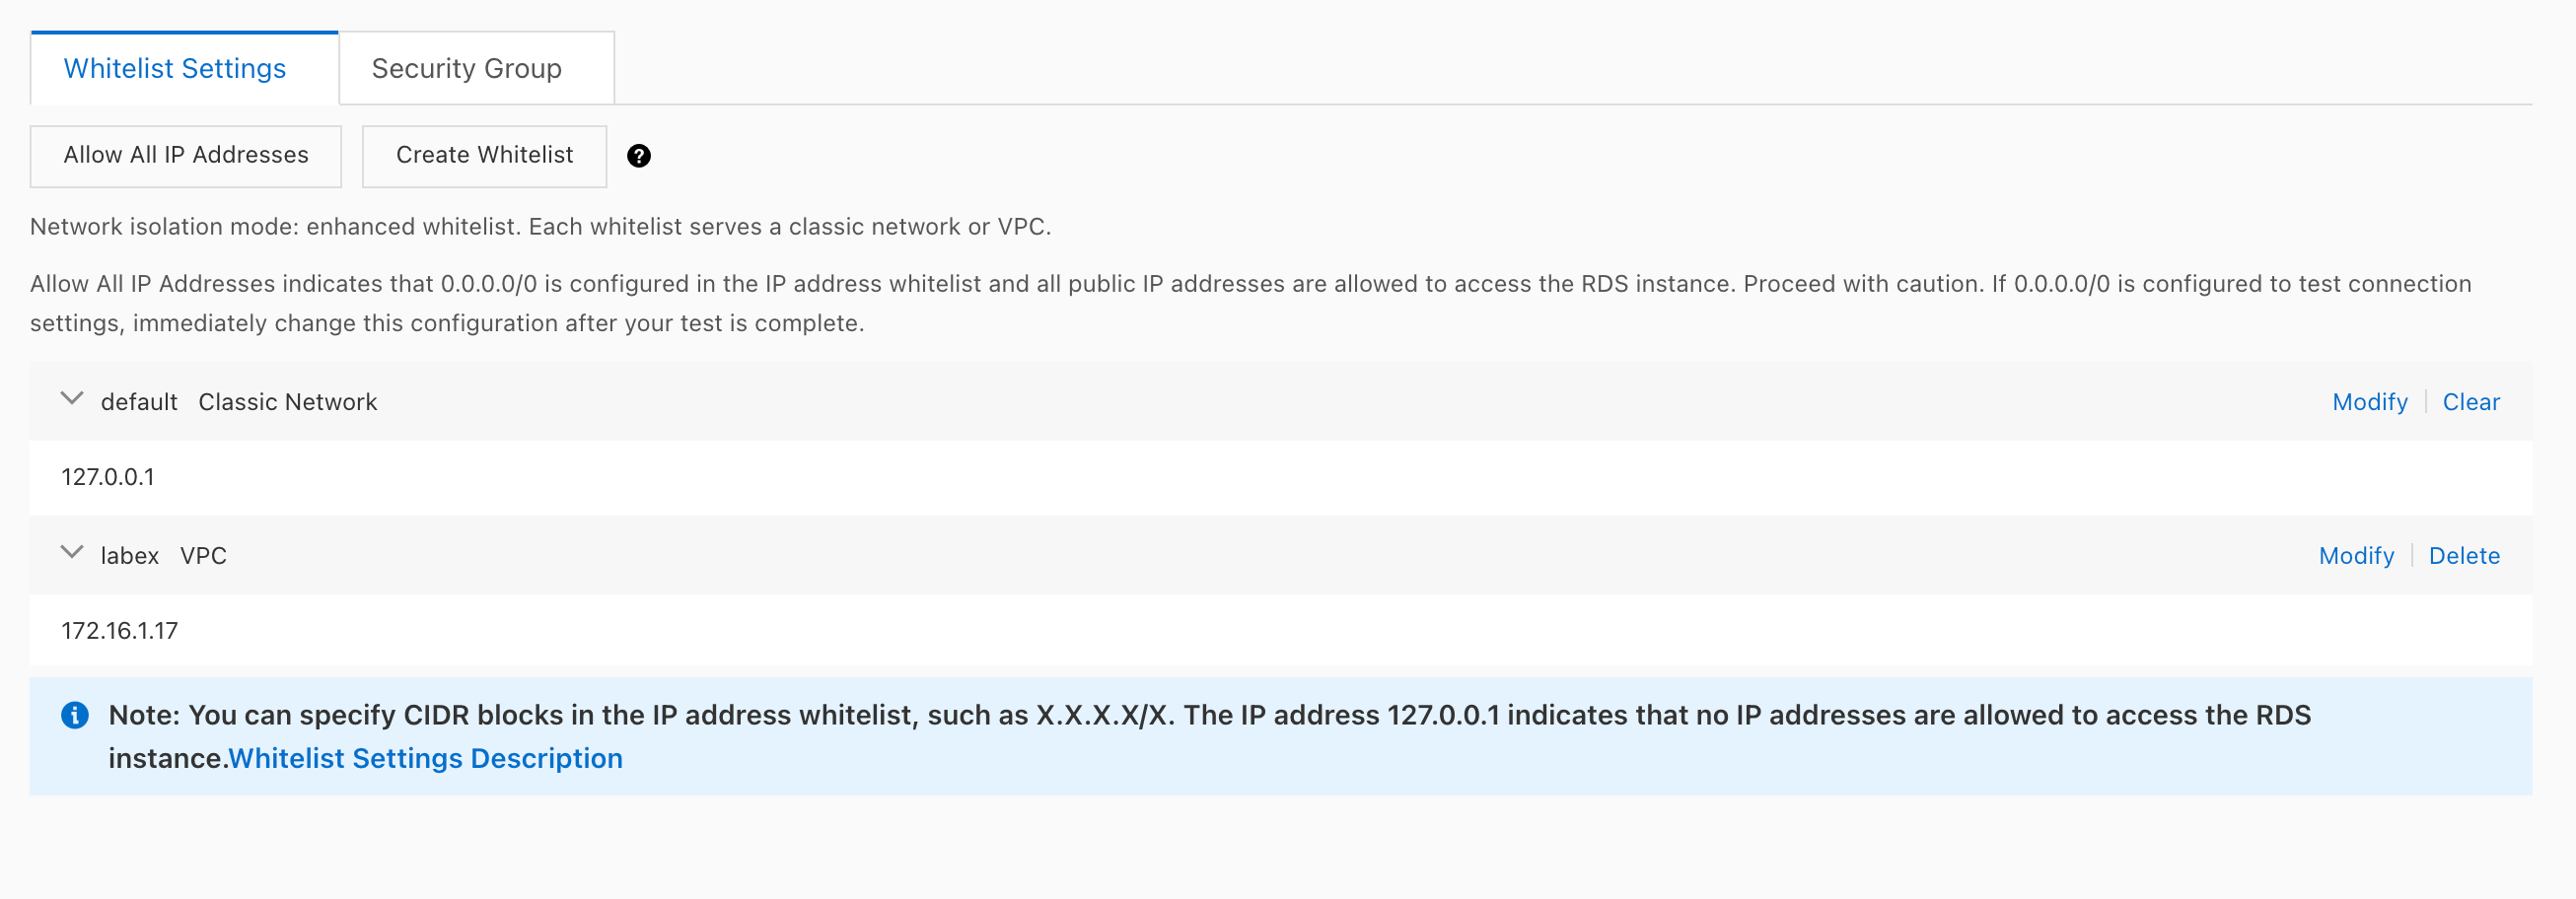
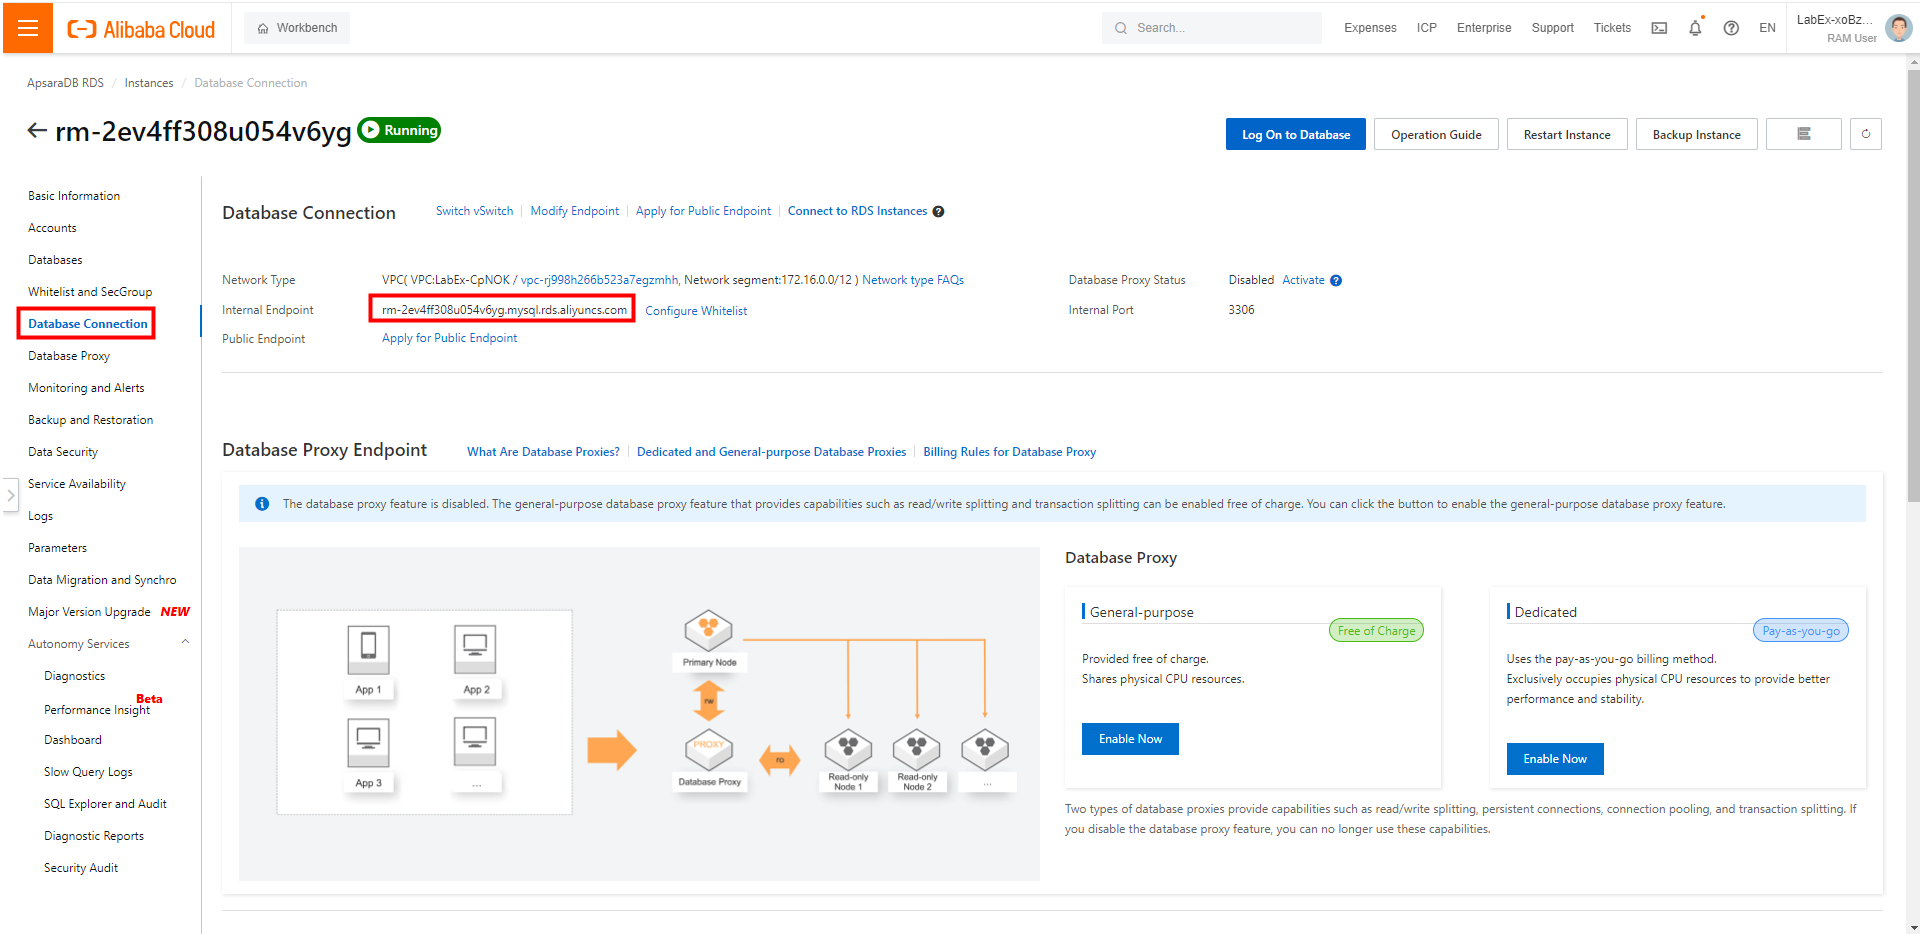
Now you can view the intranet IP address of the RDS instance.
2.3 Create a database and an account
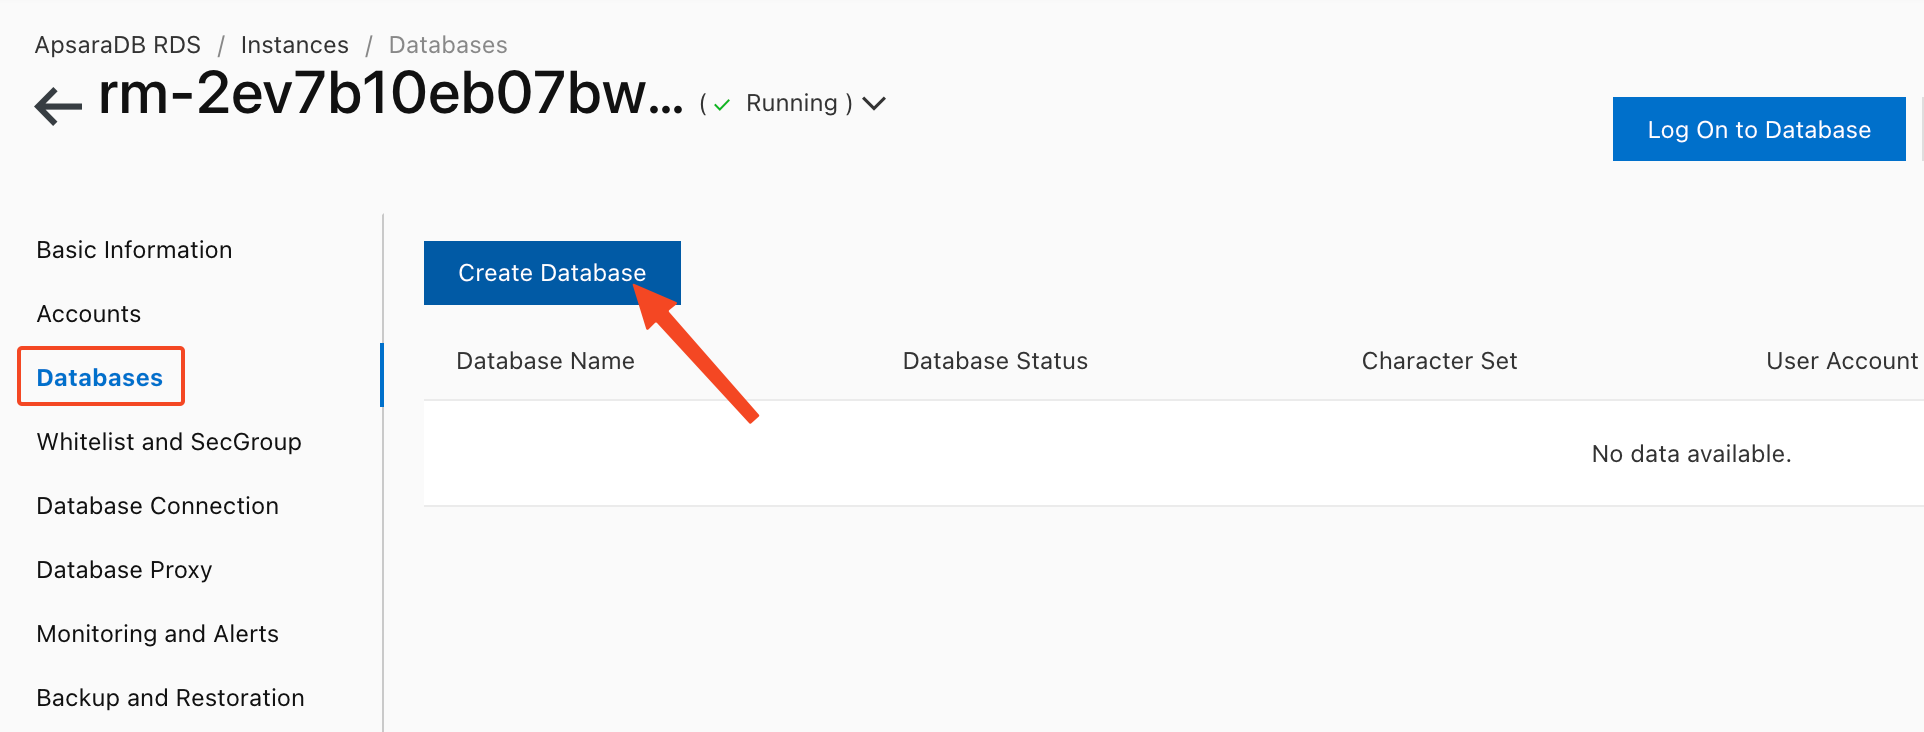
Refer to the figure below and click Create Database.
Refer to the figure below to set the database name, click Create.
Created successfully.

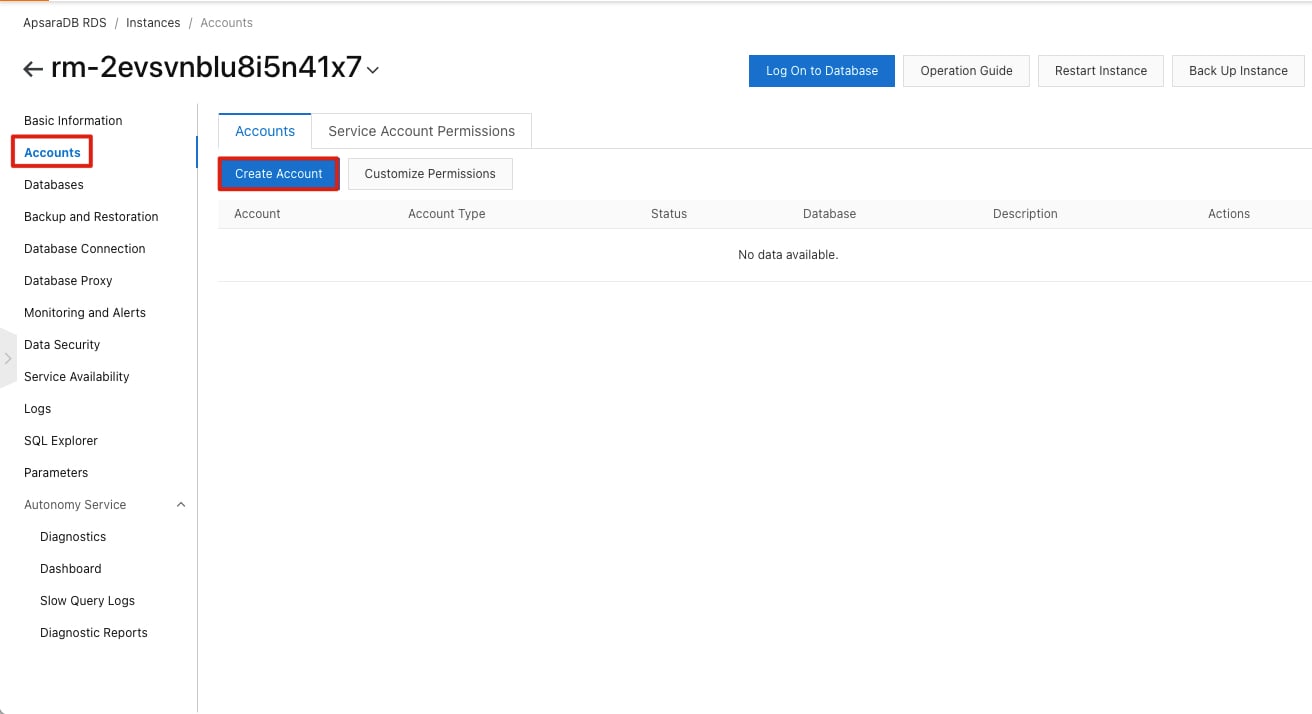
Refer to the figure below and click Create Account.
Refer to the following to set the account name and password.
Account information
Username: rds_admin
Password: Aliyun-test
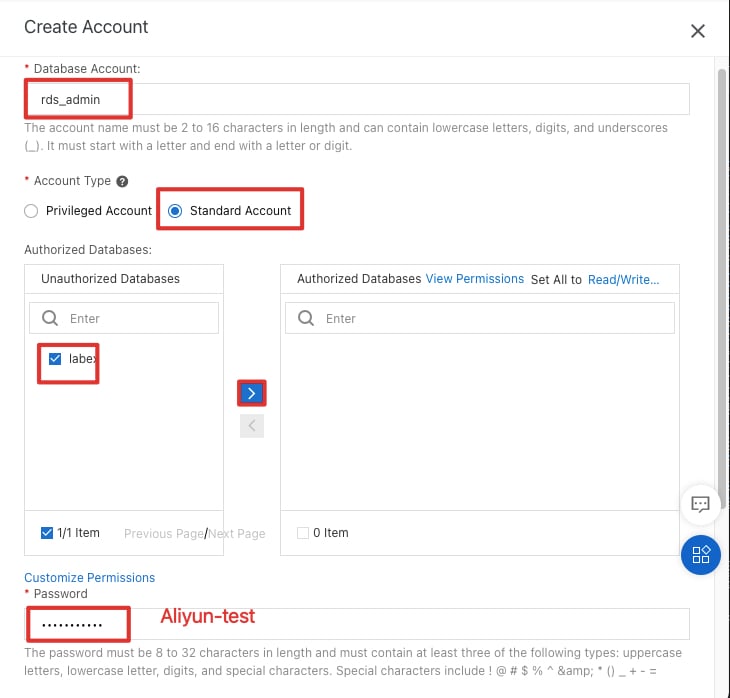
Click OK.
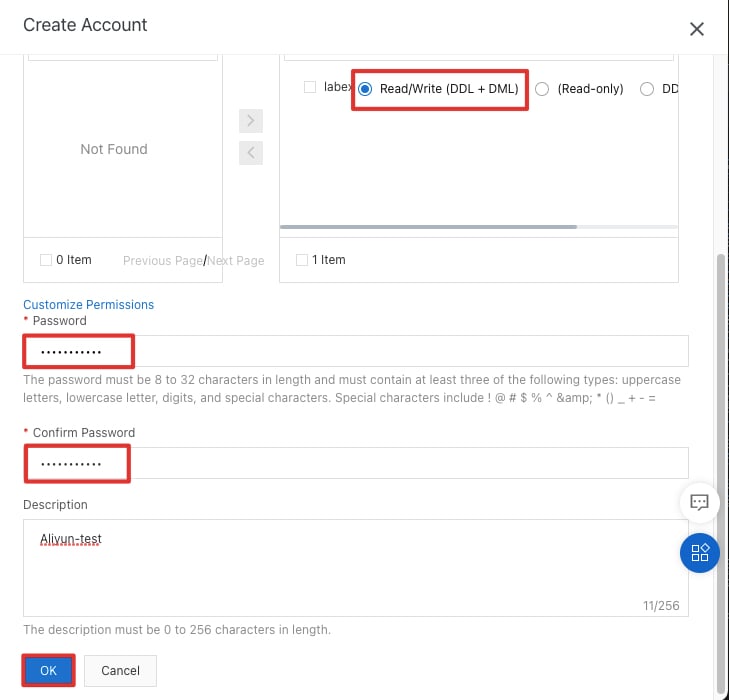
Created successfully.

2.4 Remotely connect to the RDS instance
Click Elastic Computer Service, as shown in the following picture.
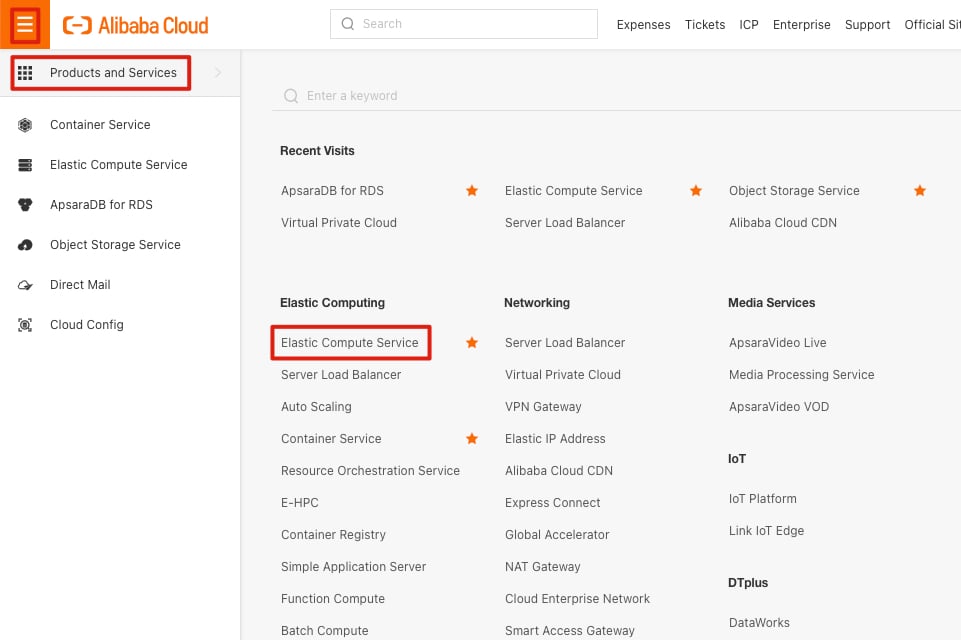
We can see one running ECS instance in the US (Silicon Valley) region. Click it to go to the ECS console as shown in the following picture.
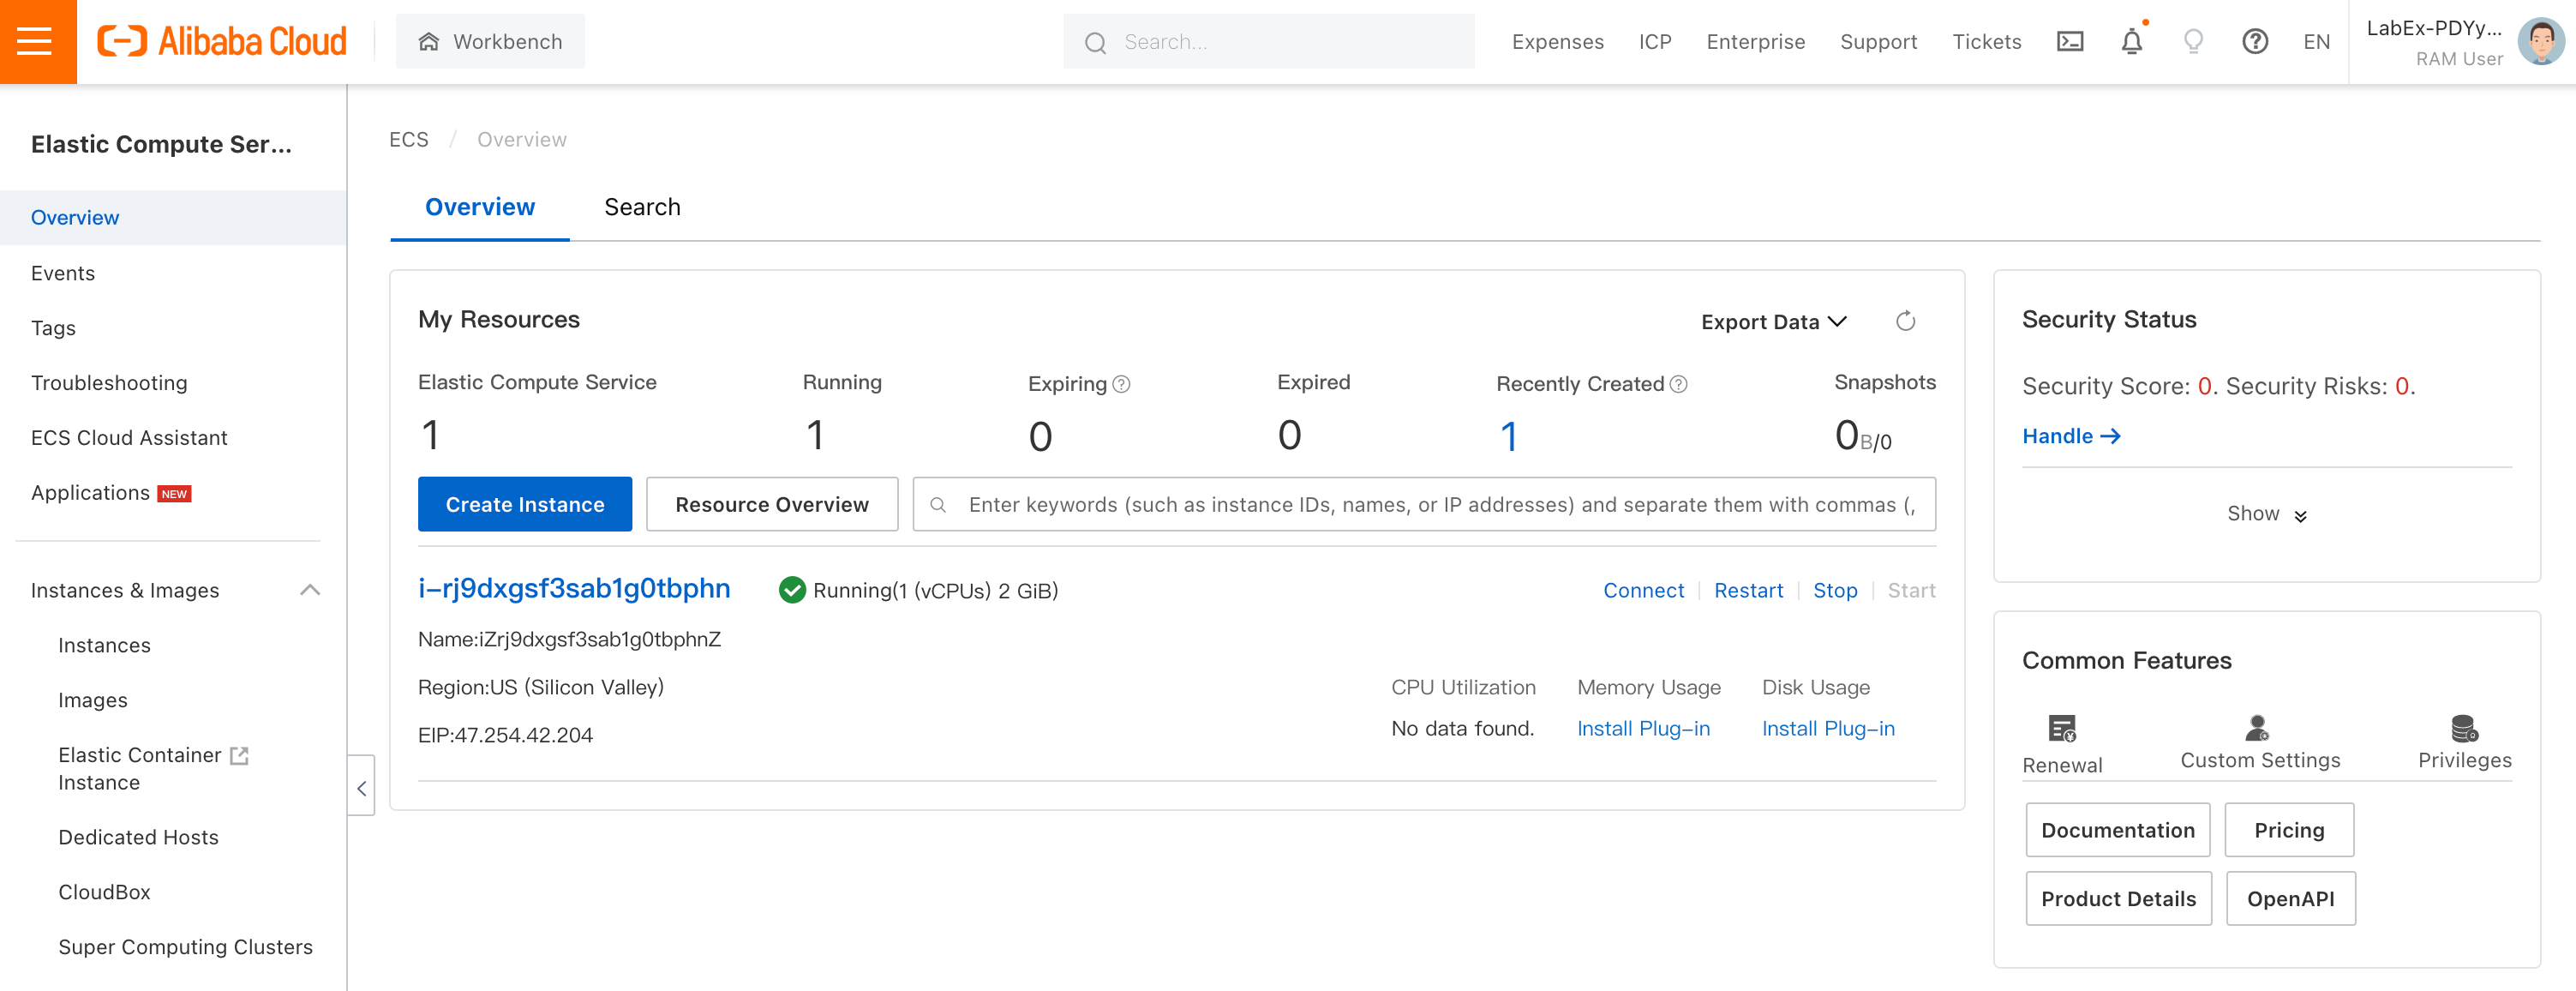
Click on the Instances button in the left menu bar to switch to the instance console.
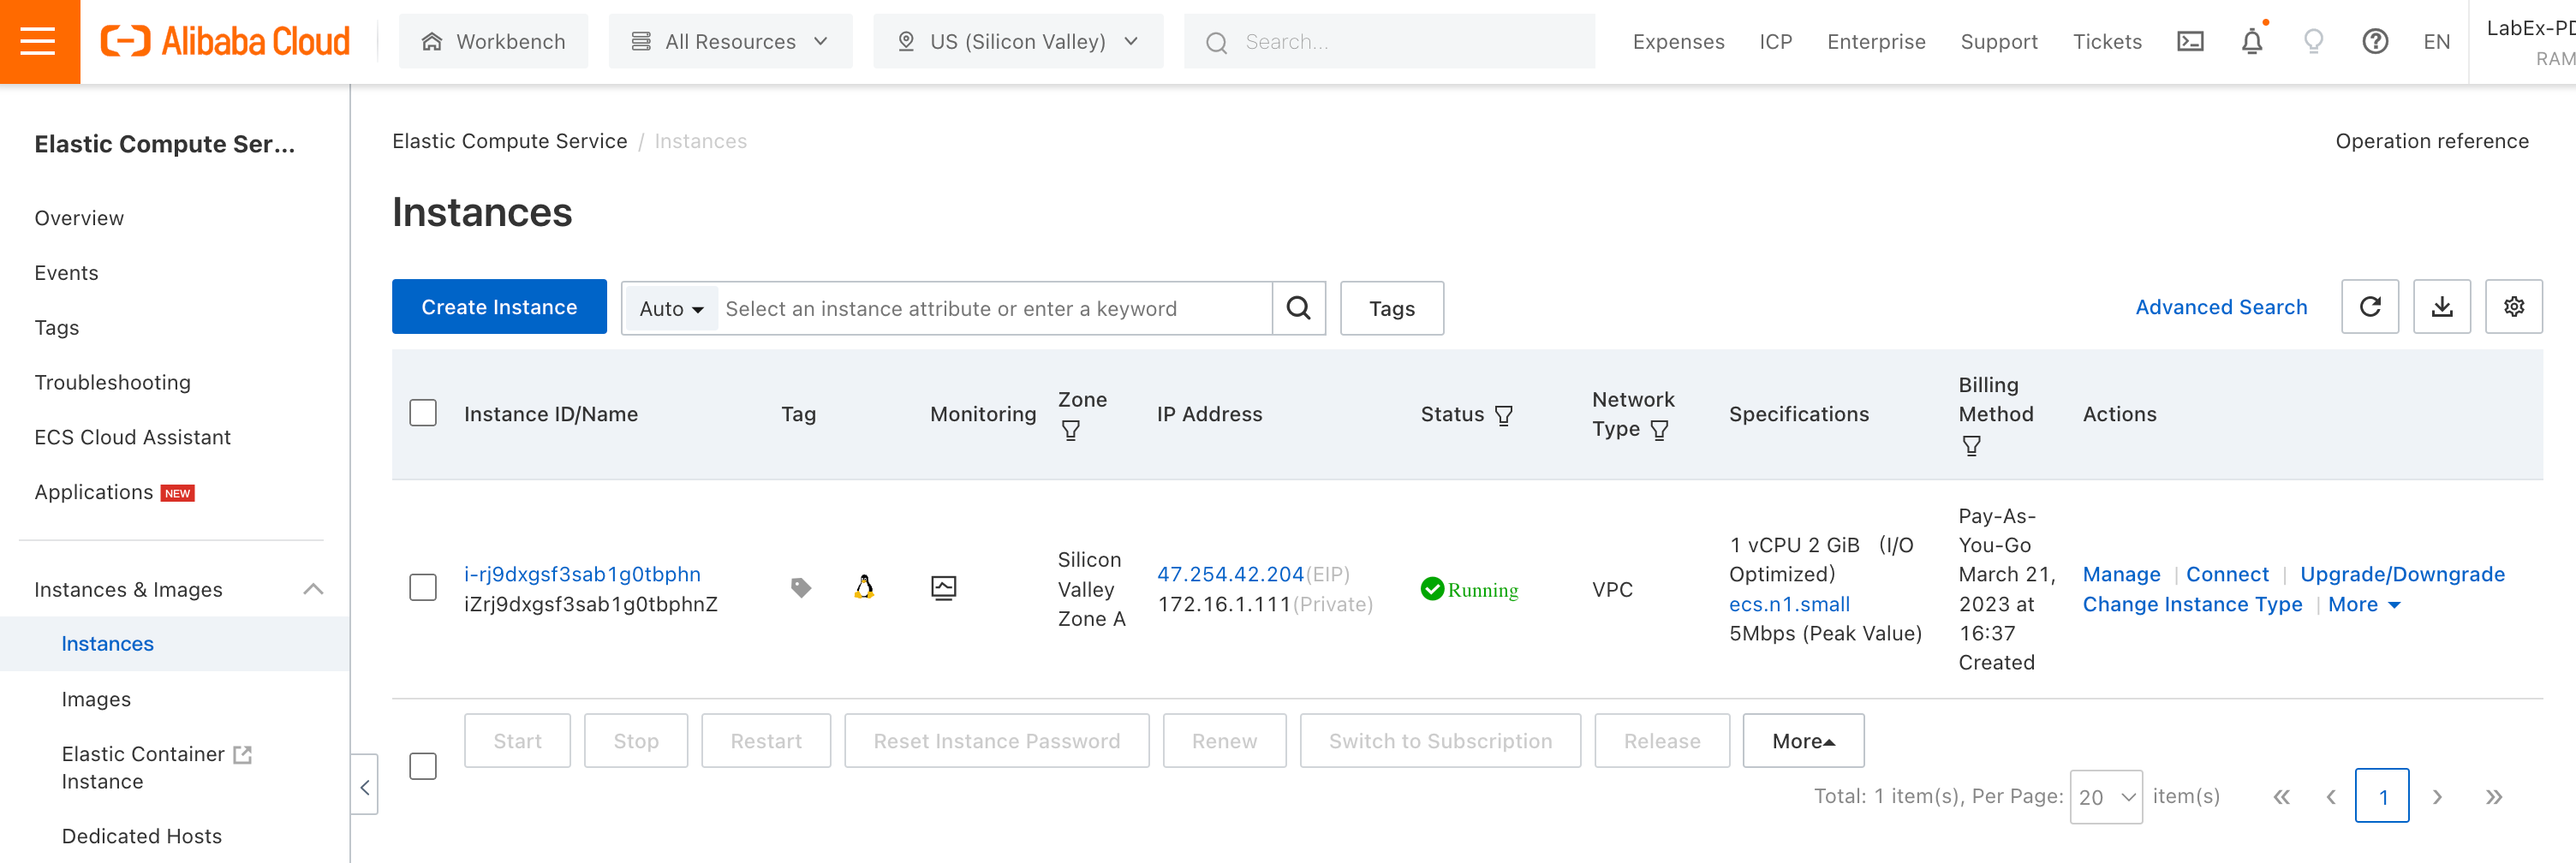
If the console prompts you that no instances were found in the current region, don't worry, this is because the instance we started is not in the current default region. Click on the region switch button above and switch to the US (Silicon Valley) region.
The same applies when using other services.
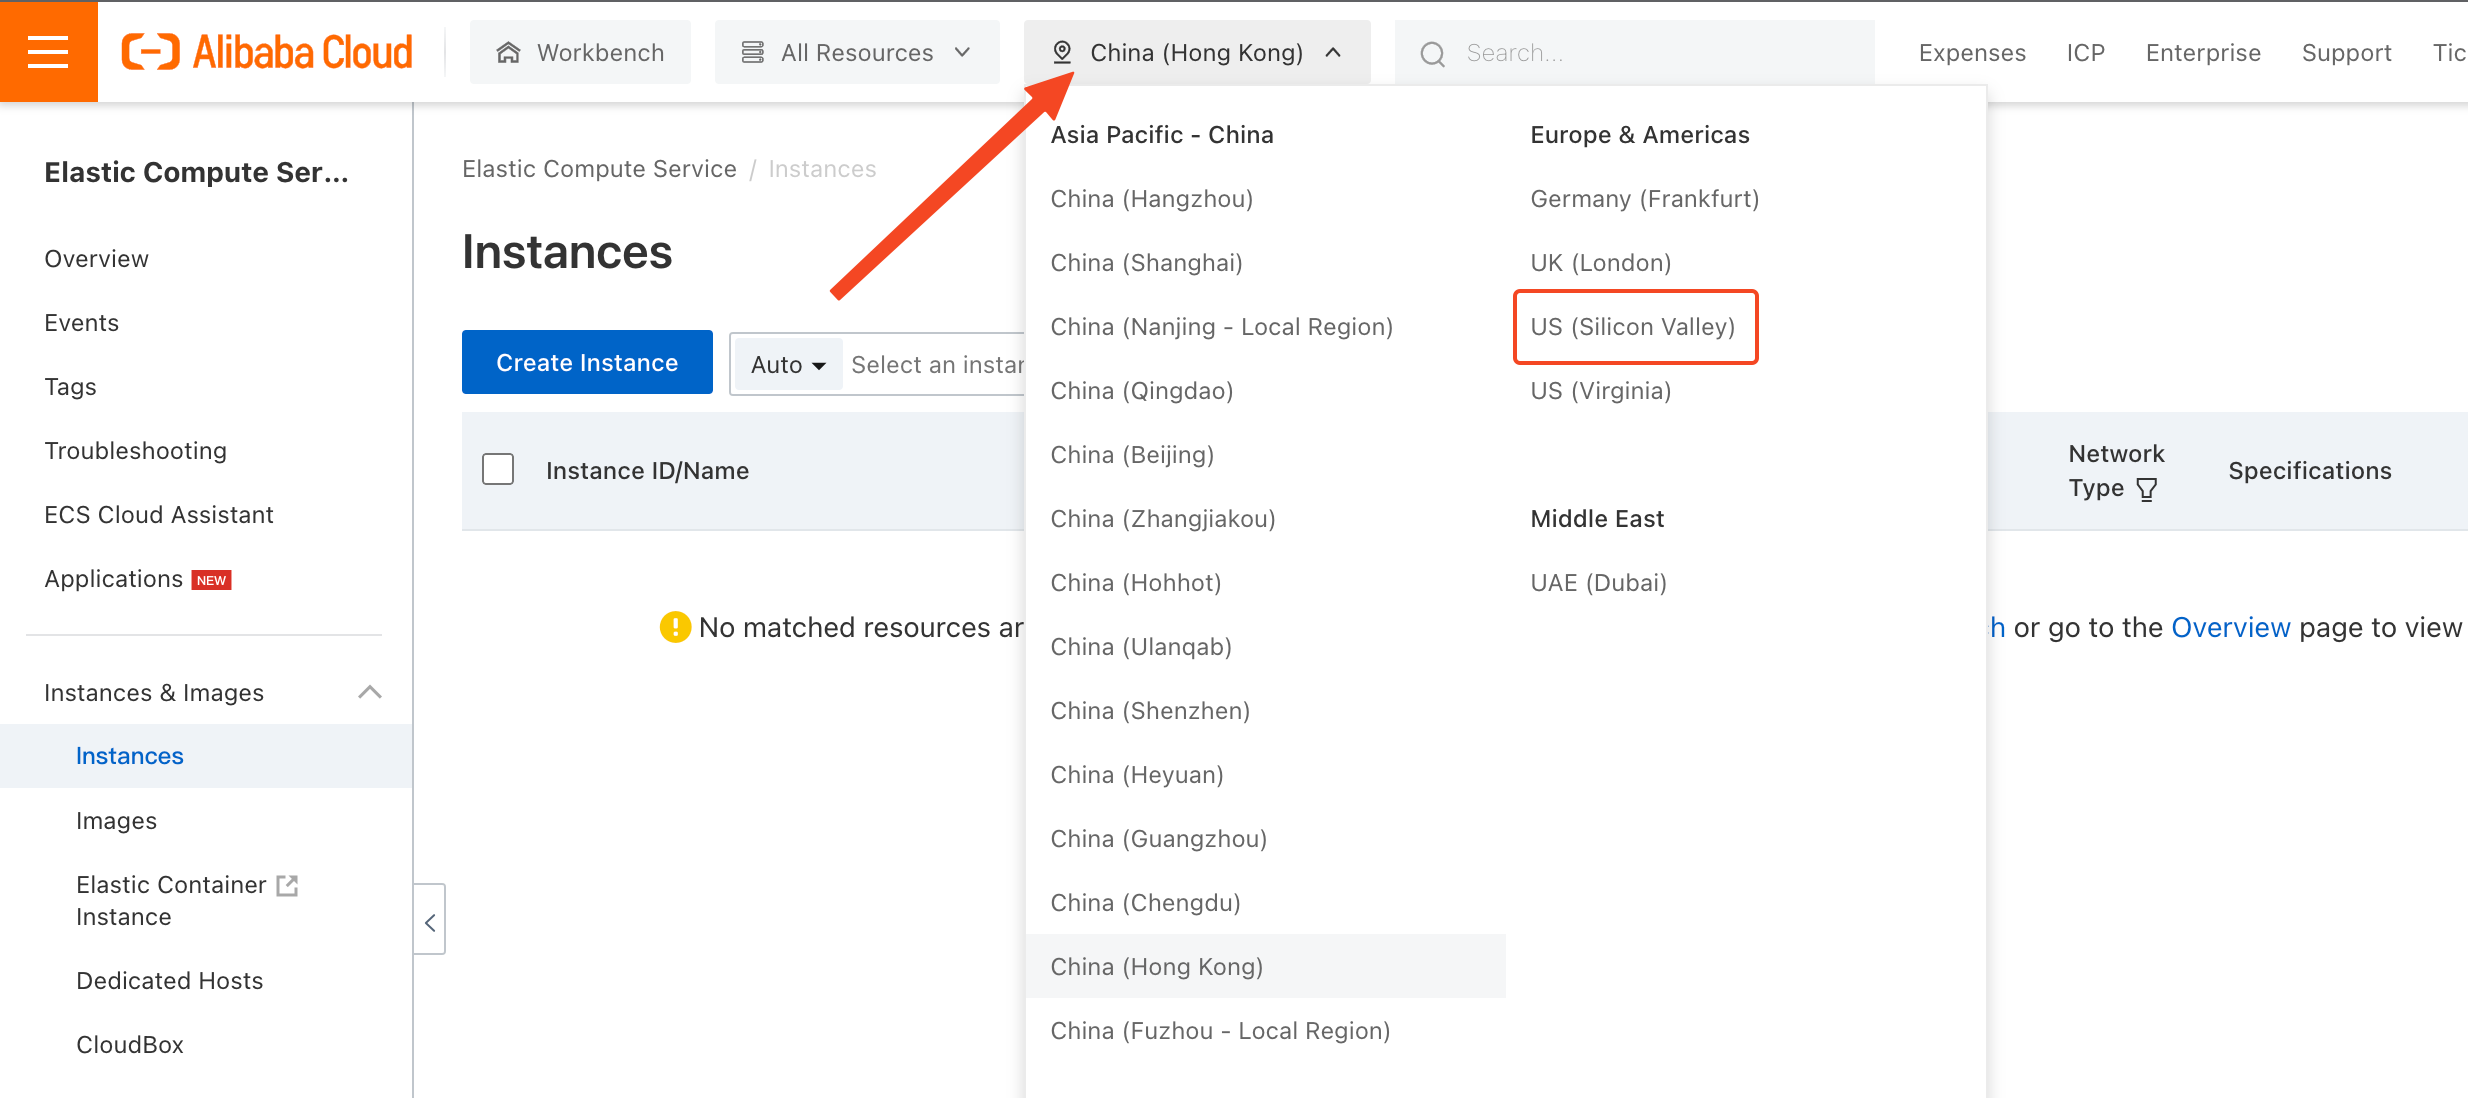
In the ECS console, locate the row that contains the target ECS instance and click Connect in the Actions column, as shown in the following figure.

Now, Alibaba Cloud provides us with a very useful tool called Workbench. It is a terminal program that runs in the browser and can seamlessly connect to our instance, as well as provide various advanced features.
If you want to use it, click the Sign in now button.

The default account name and password of the ECS instance:
Account name:root
Password:nkYHG890..
In the pop-up window, you only need to enter the password for your instance, as all other configurations are already associated with this instance by default.
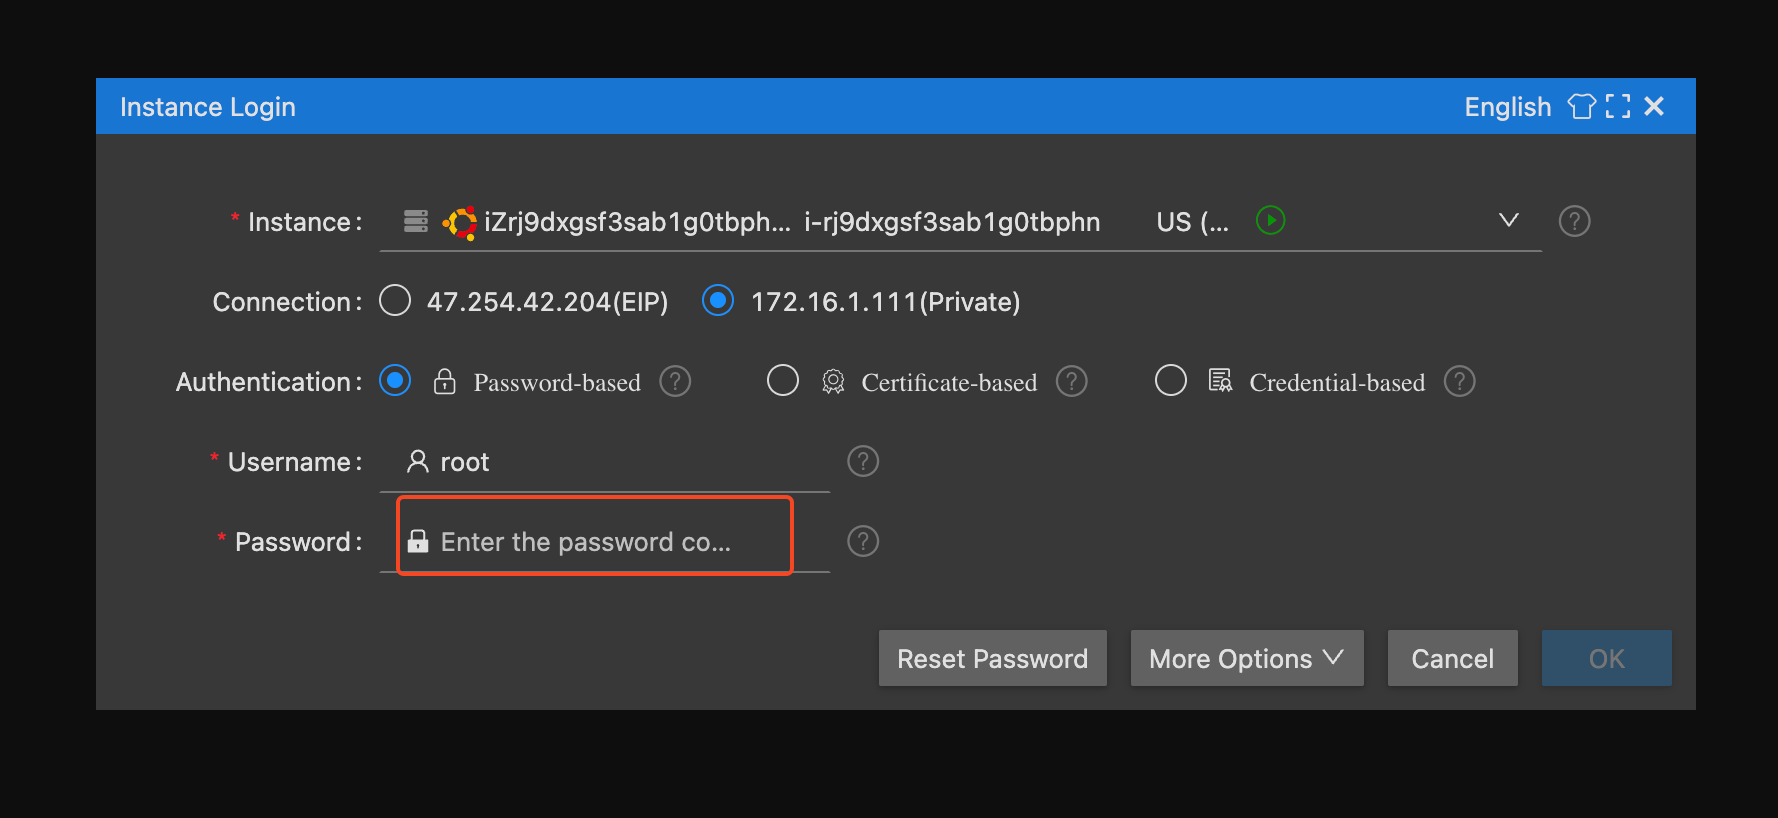
Then click OK to connect to the instance. As shown in the following figure, you have successfully logged in to the instance.
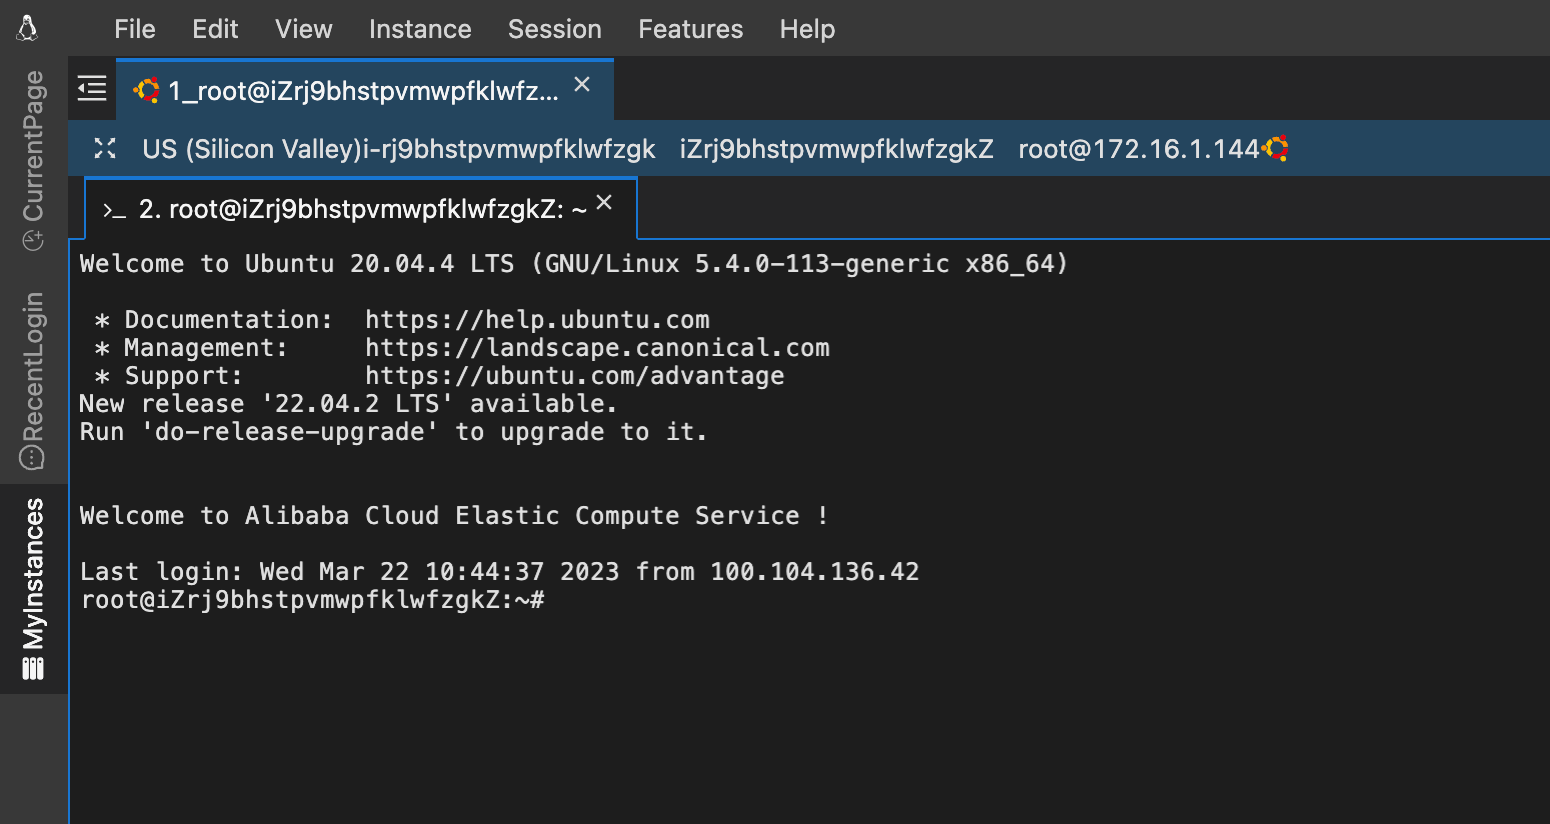
You can also choose the tool you prefer to connect to the ECS instance. For details of remote logon, refer to logon.
Run the following commands:
apt-get update
apt-get install mysql-client -y
Remote connection command:
mysql -urds_admin -p -h YOUR-INTRANET-ADDRESS-OF-RDS -P3306Password: Aliyun-test

2.5 Add data
Run SQL statements to create data tables and add instance data. Note that every SQL statement ends with a semicolon (;).
View the current database:
show databases;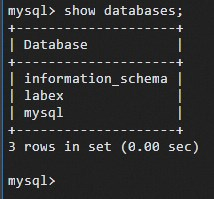
The name of the created database labex is returned. Select labex and create a data table:
use labex;
create table user (id int, name char(11));
A data table named "user" is created in labex.

Insert a test data record and query the data in the data table:
insert into user values (1, 'aliyun');
select * from user;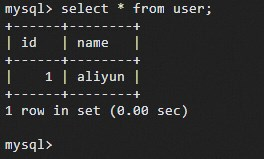
This completes the creation and usage of an RDS for MySQL database.
Reminder:
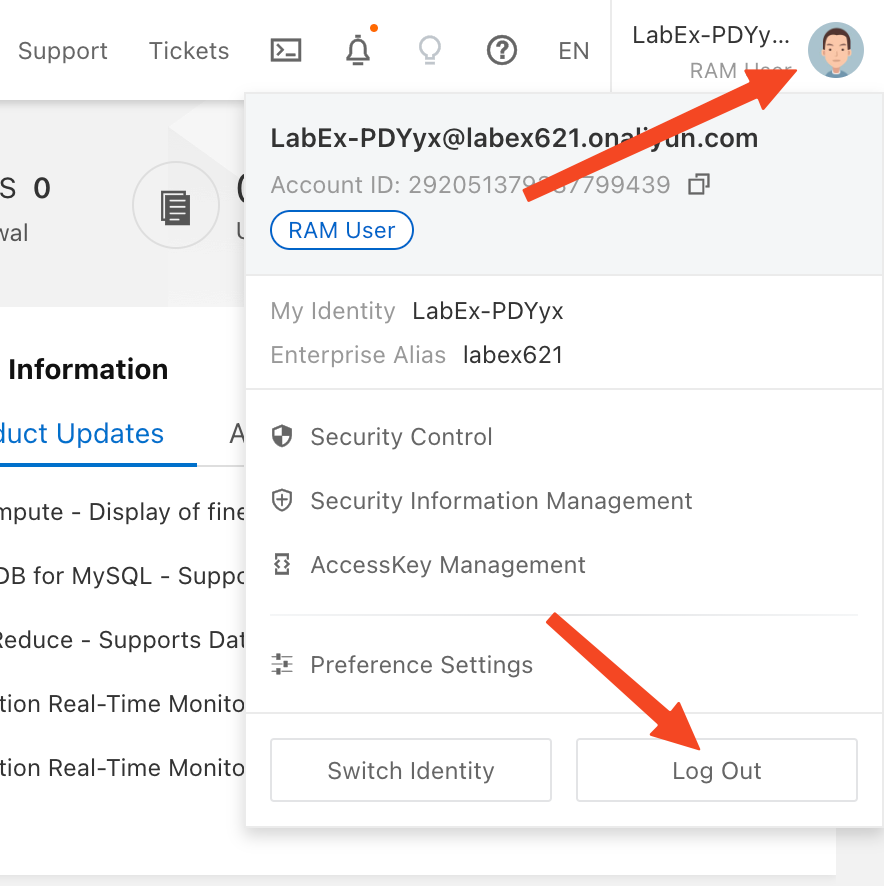
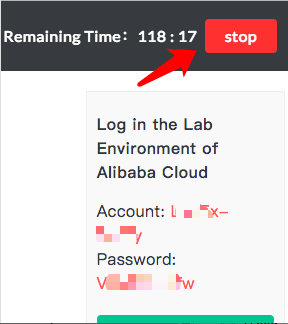
Before you leave this lab, remember to log out your Alibaba RAM account before you click the 'stop' button of your lab. Otherwise you'll encounter some issue when opening a new lab session in the same browser:
3. Experiment conclusion
This lab is designed to build a relational database through RDS. RDS for MySQL is used as an example. The process of building the relational database is summarized as follows:
- Create an RDS instance
- Set a whitelist
- Apply for an Internet address
- Create an account and a database
- Remotely log on to the RDS instance
- Run SQL commands in the RDS instance
The building process is simple. I hope you can understand the knowledge points in this lab.