Labex Basic Application of ECS Security Groups
Basic Application of ECS Security Groups
1. Introduction
1.1 Knowledge points
This lab describes the basic application of Alibaba Cloud Elastic Compute Service (ECS) security groups to enhance users' understanding of security groups and enable users to adjust security group rules based on their business requirements. A security group functions as a virtual firewall of a server and controls network access to one or more ECS instances. It is an important network security isolation method.
1.2 Lab Steps
- Query security groups.
- Ping an ECS instance from the Internet.
- Remotely connect to an ECS instance through Secure Shell (SSH).
- Use an ECS instance as a web server.
1.3 Cloud resources required
- ECS
1.4 Prerequisites
- You understand ECS.
- If you're using your own Alibaba Cloud account instead of the account provided by this lab to operate the lab, please note that you'll need to choose the same Ubuntu 16.04 operating system for your ECS in order to run the lab smoothly.
2. Start the lab environment
If you have just completed a lab session, ensure you log out of your Alibaba Cloud account before starting a new lab. This prevents issues when opening a new lab session in the same browser.
Click Start Lab in the upper right corner of the page to start the lab.

Once the lab environment is set up, the system auto-deploys essential resources for your lab, such as ECS and RDS instances, Server Load Balancers, OSS buckets, etc. You'll also receive login credentials for the Alibaba Cloud Web console.
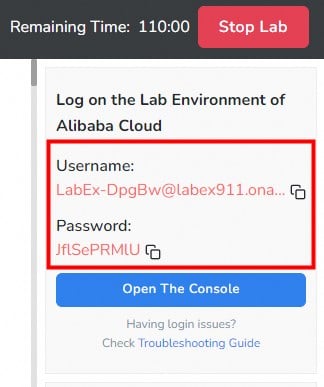
A countdown timer starts once the lab environment is ready. You have two hours to complete the lab. Pay attention to the remaining time and plan accordingly.
Next, click Open the Console to access the Alibaba Cloud RAM login page. Use the Username and Password provided by the system to log in to Alibaba Cloud and view the relevant resources.

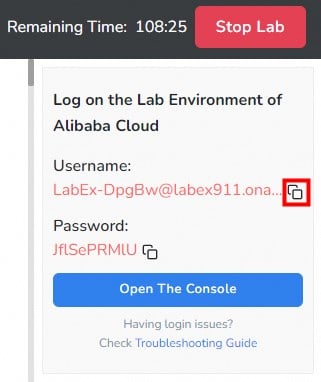
Copy and enter the provided account username and click Next.

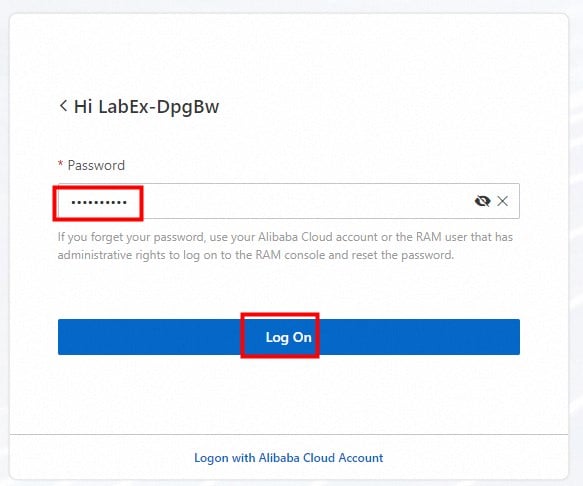
Copy and enter the provided password and click Log On.

After successfully logging in, click OK to view the main console page.


3. Query security groups
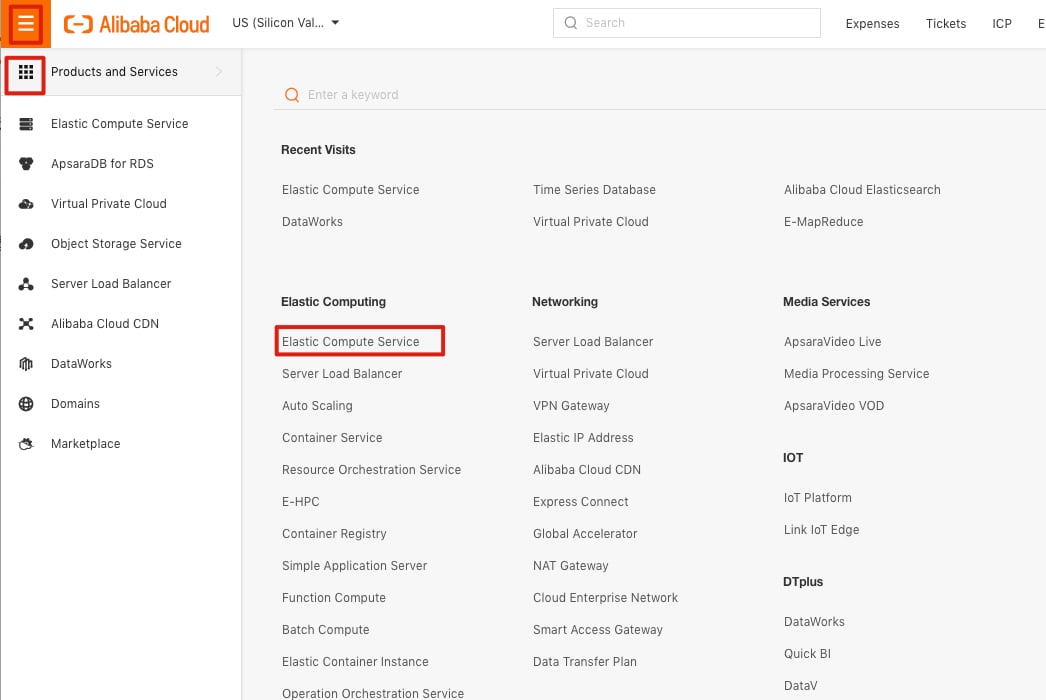
Click Elastic Computer Service, as shown in the following picture.
We can see one running ECS instance in the US West 1 region.
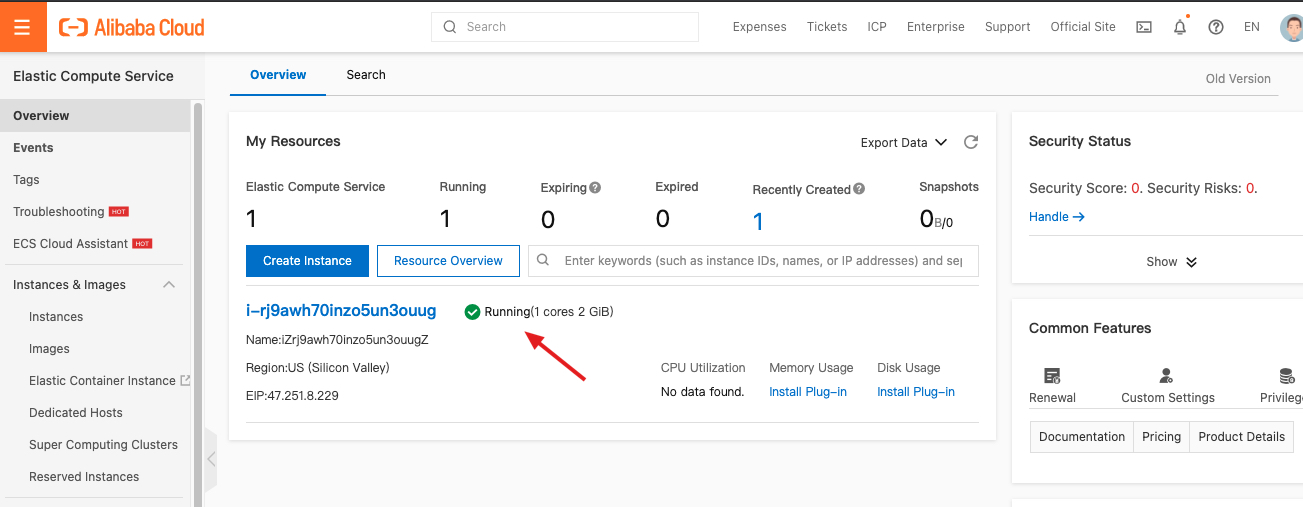
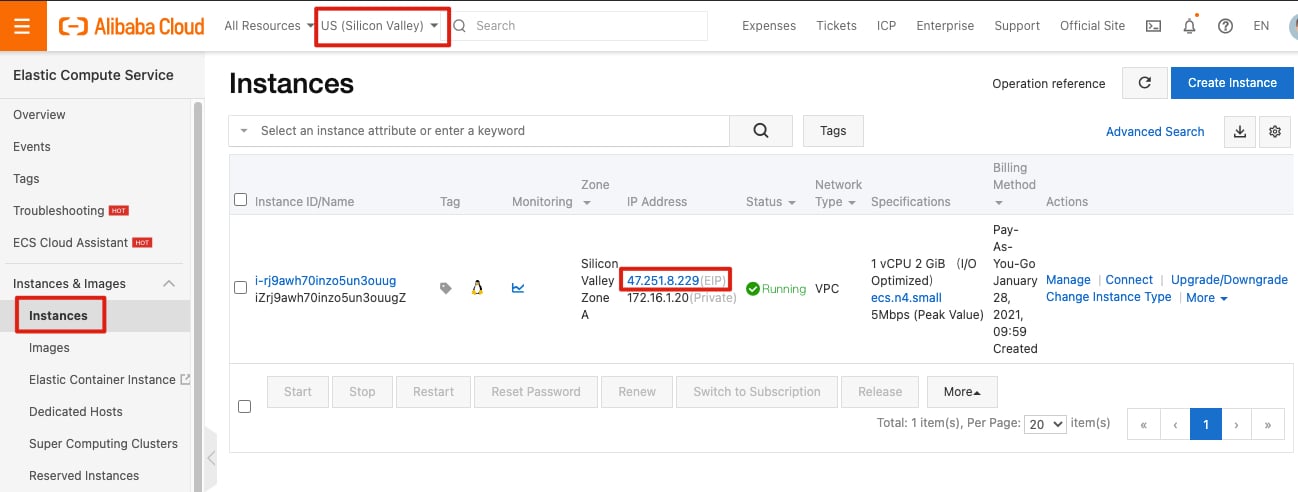
Select Security Group to view the security group to which the ECS instance belongs. Click Manage Rules.
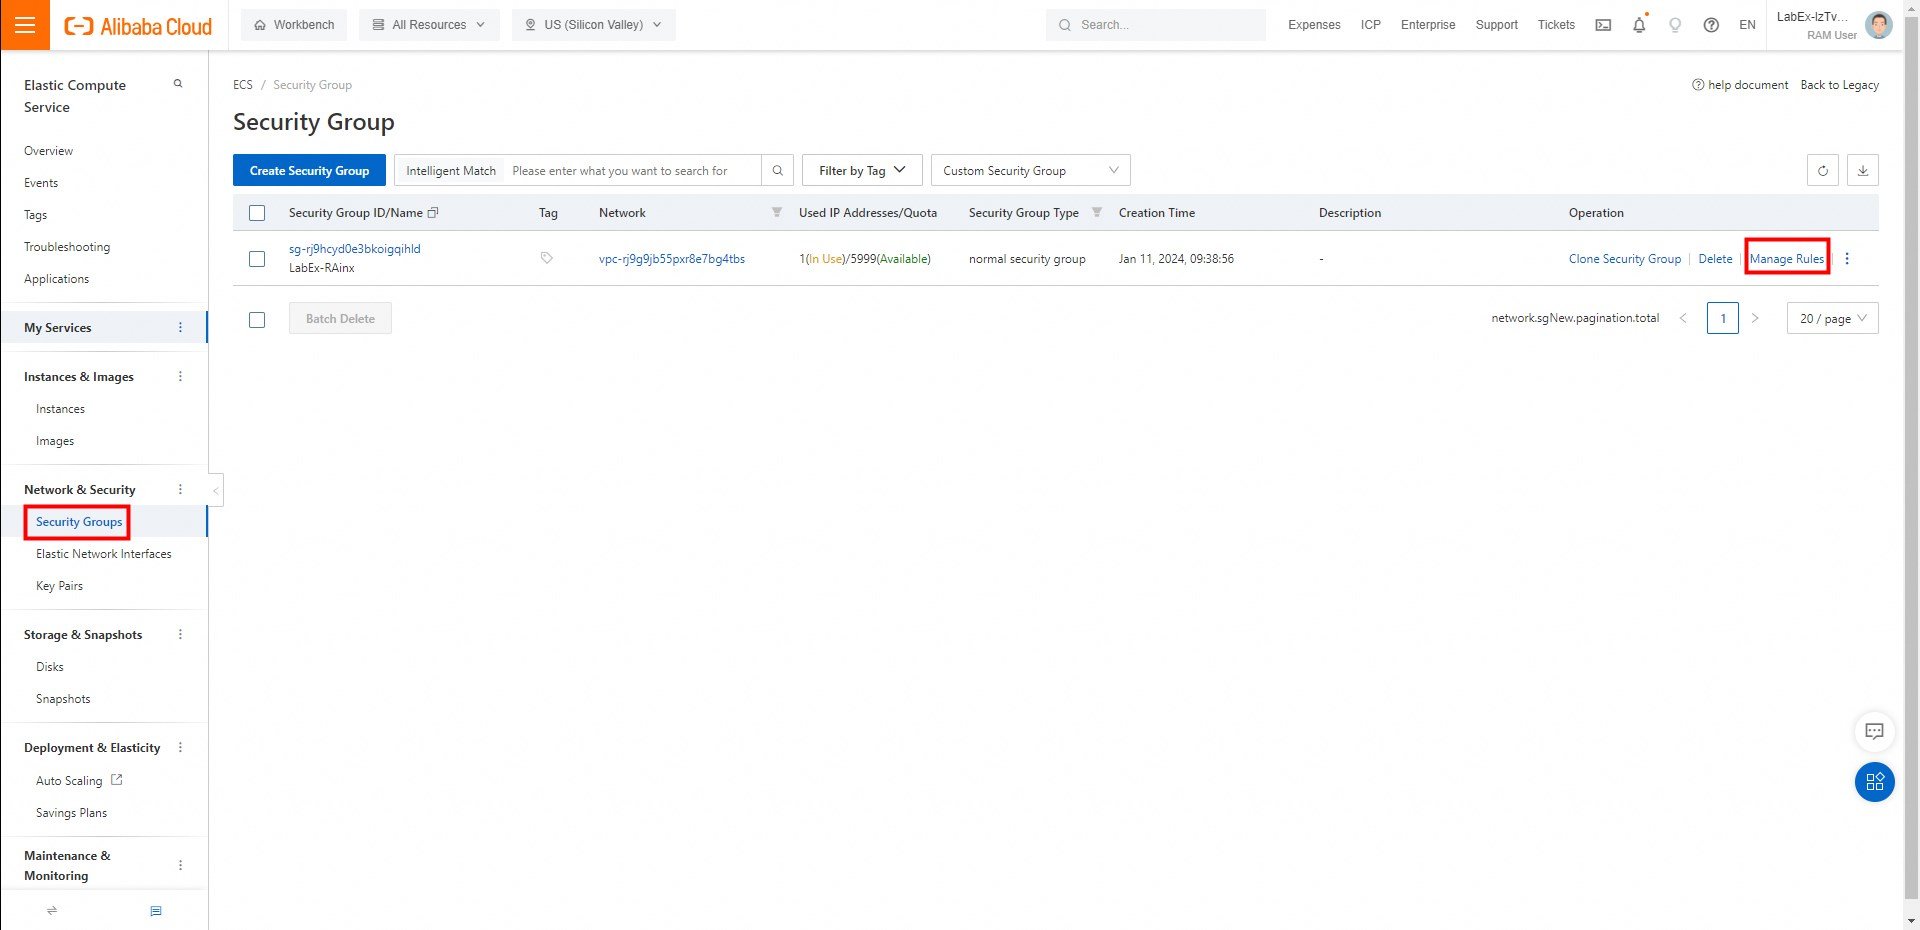
You can view rules of the security group.
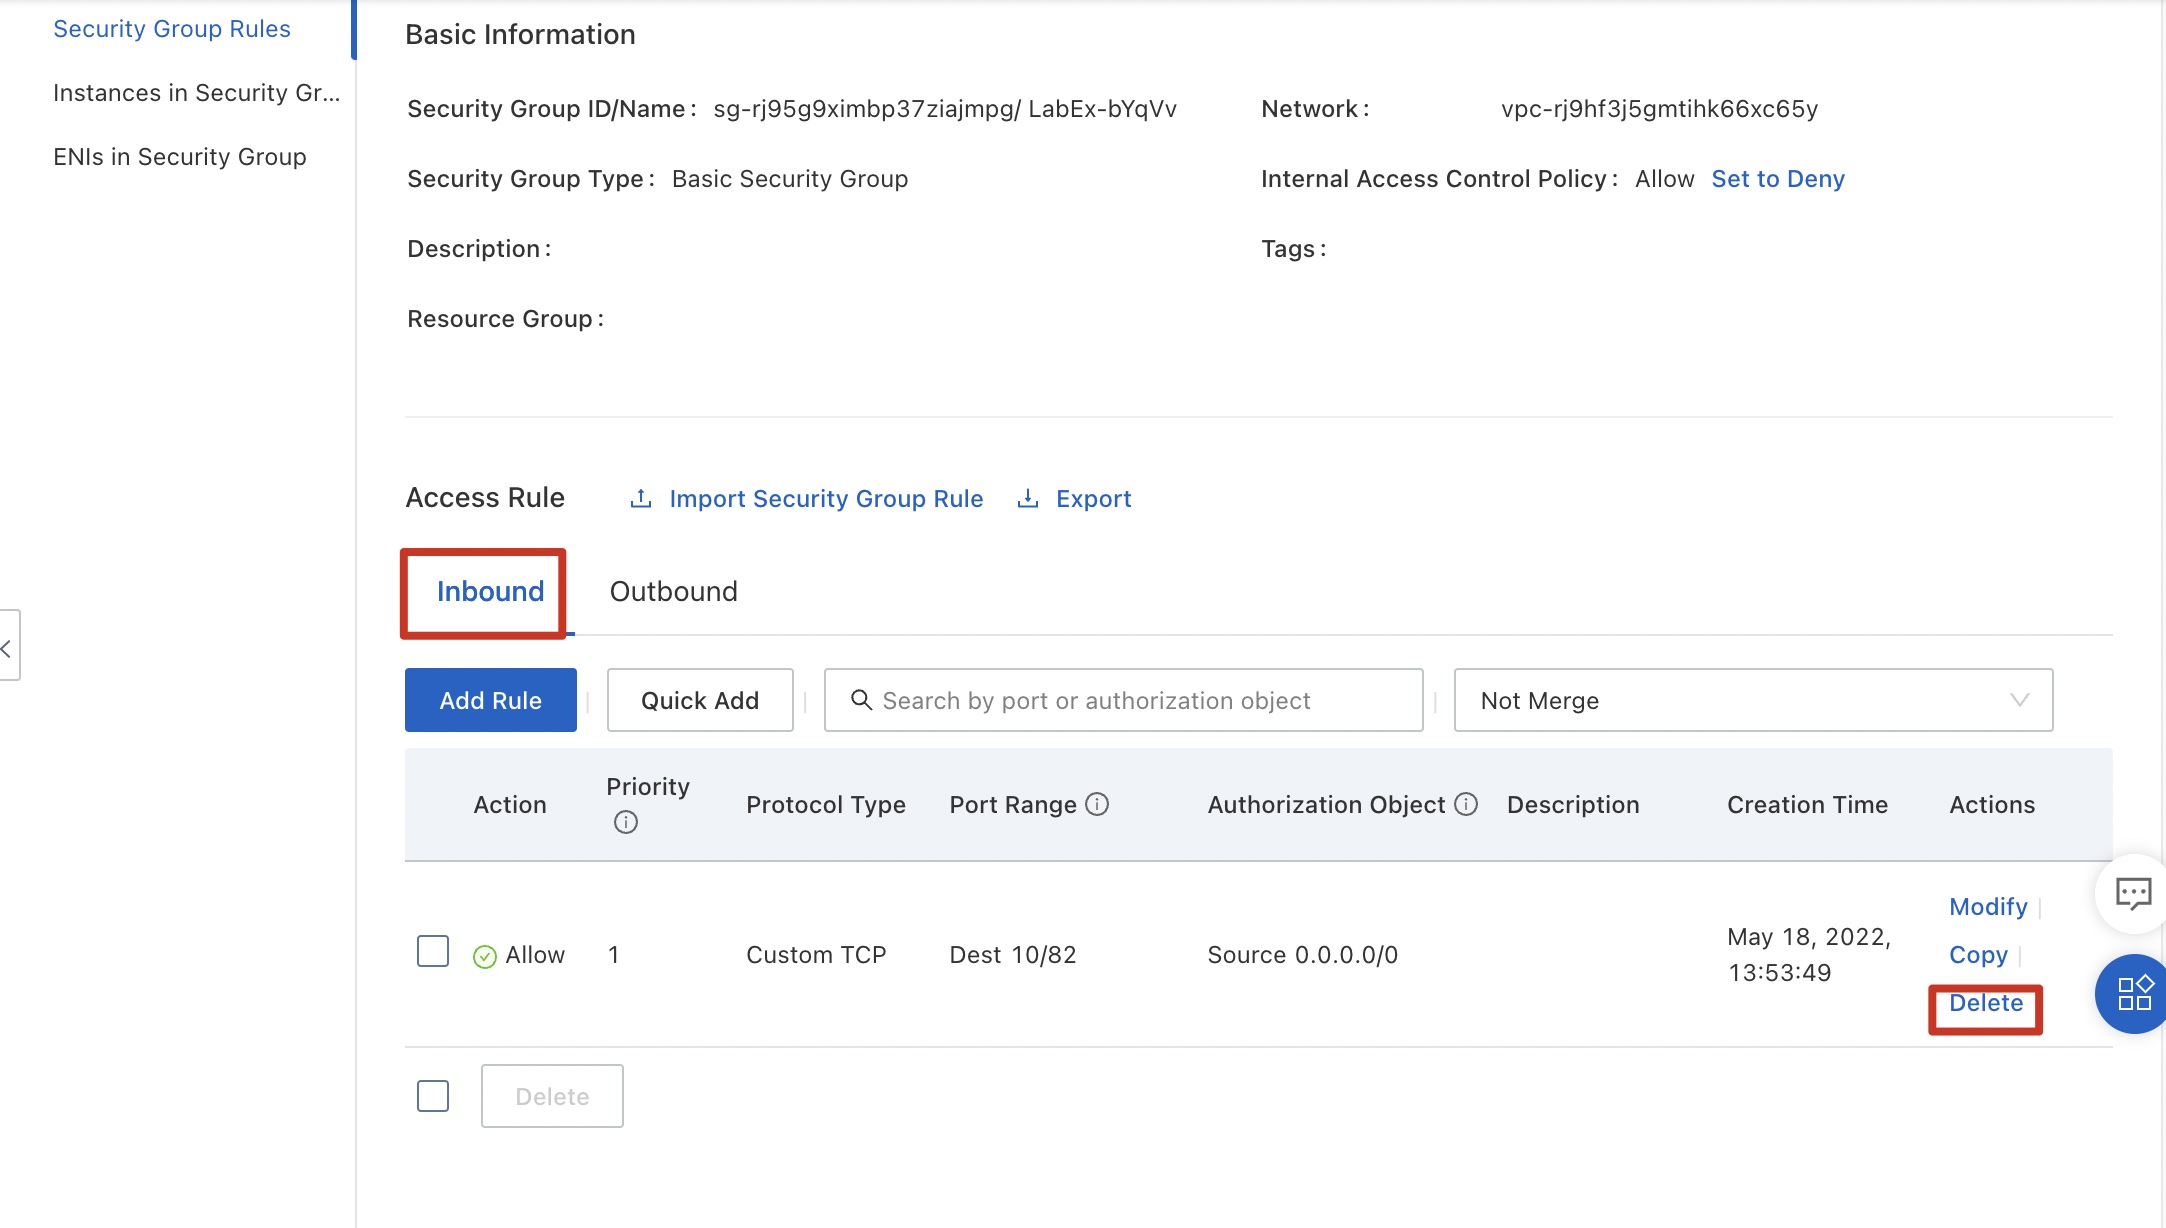
Inbound rule: The existing inbound rule allows all external servers to access ports 10 to 82.
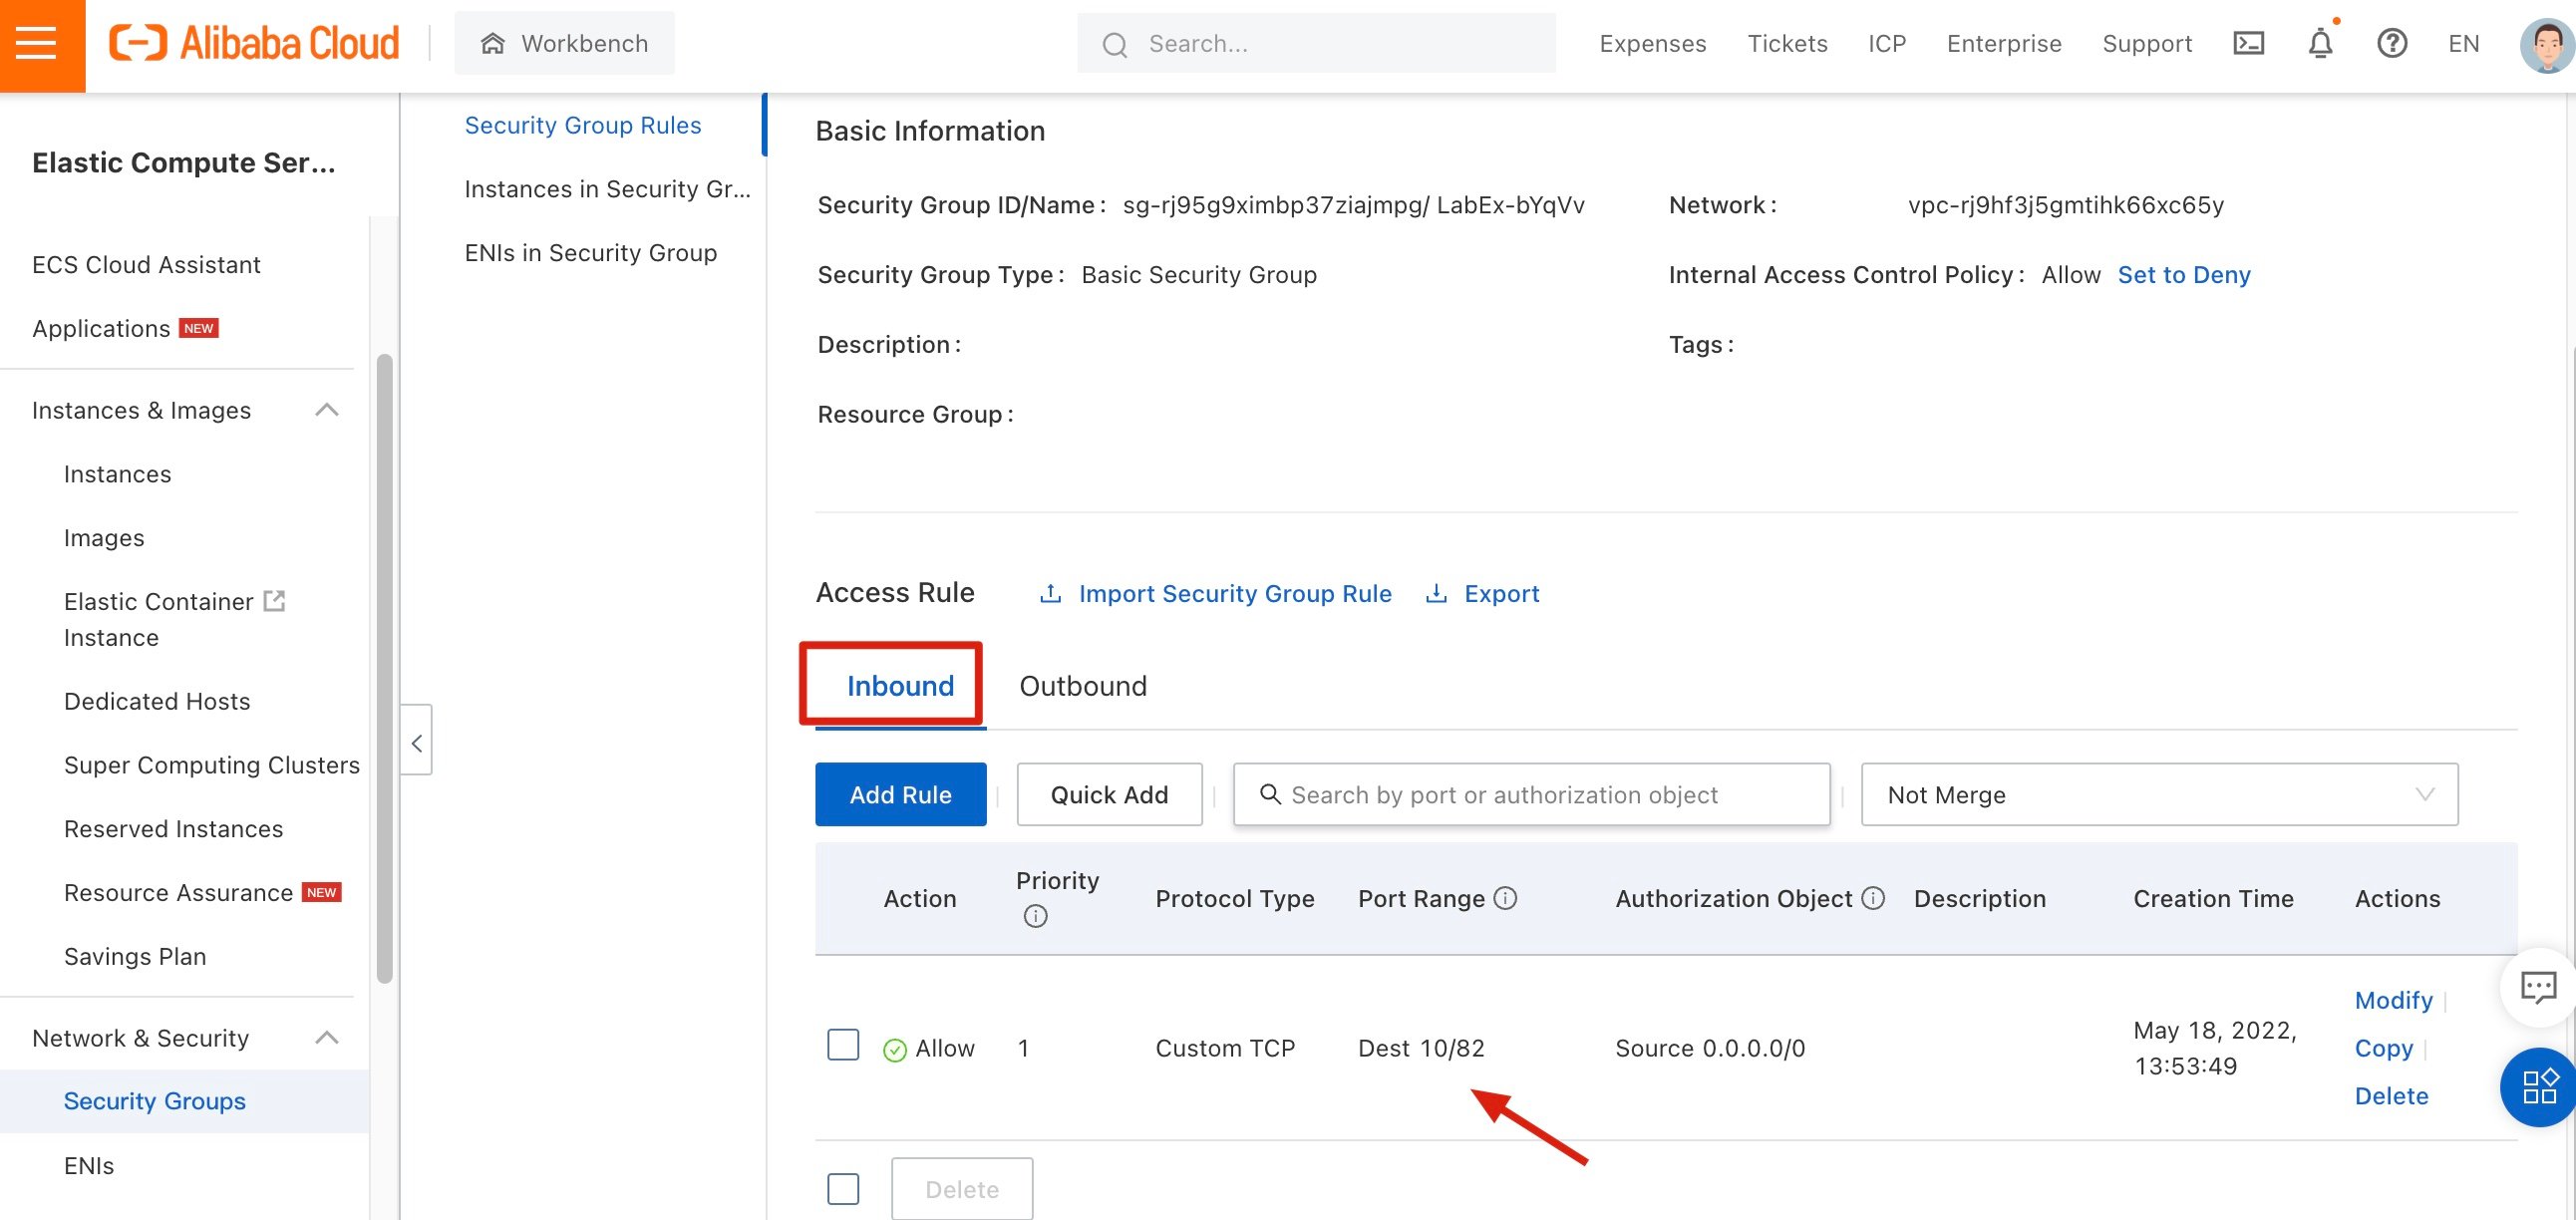
Outbound rule: The existing outbound rule allows ECS instances in the security group to access ports 10 to 81 of external servers. However, ECS instances in the security group can access all ports of external servers by default. Therefore, the existing outbound rule does not take effect.
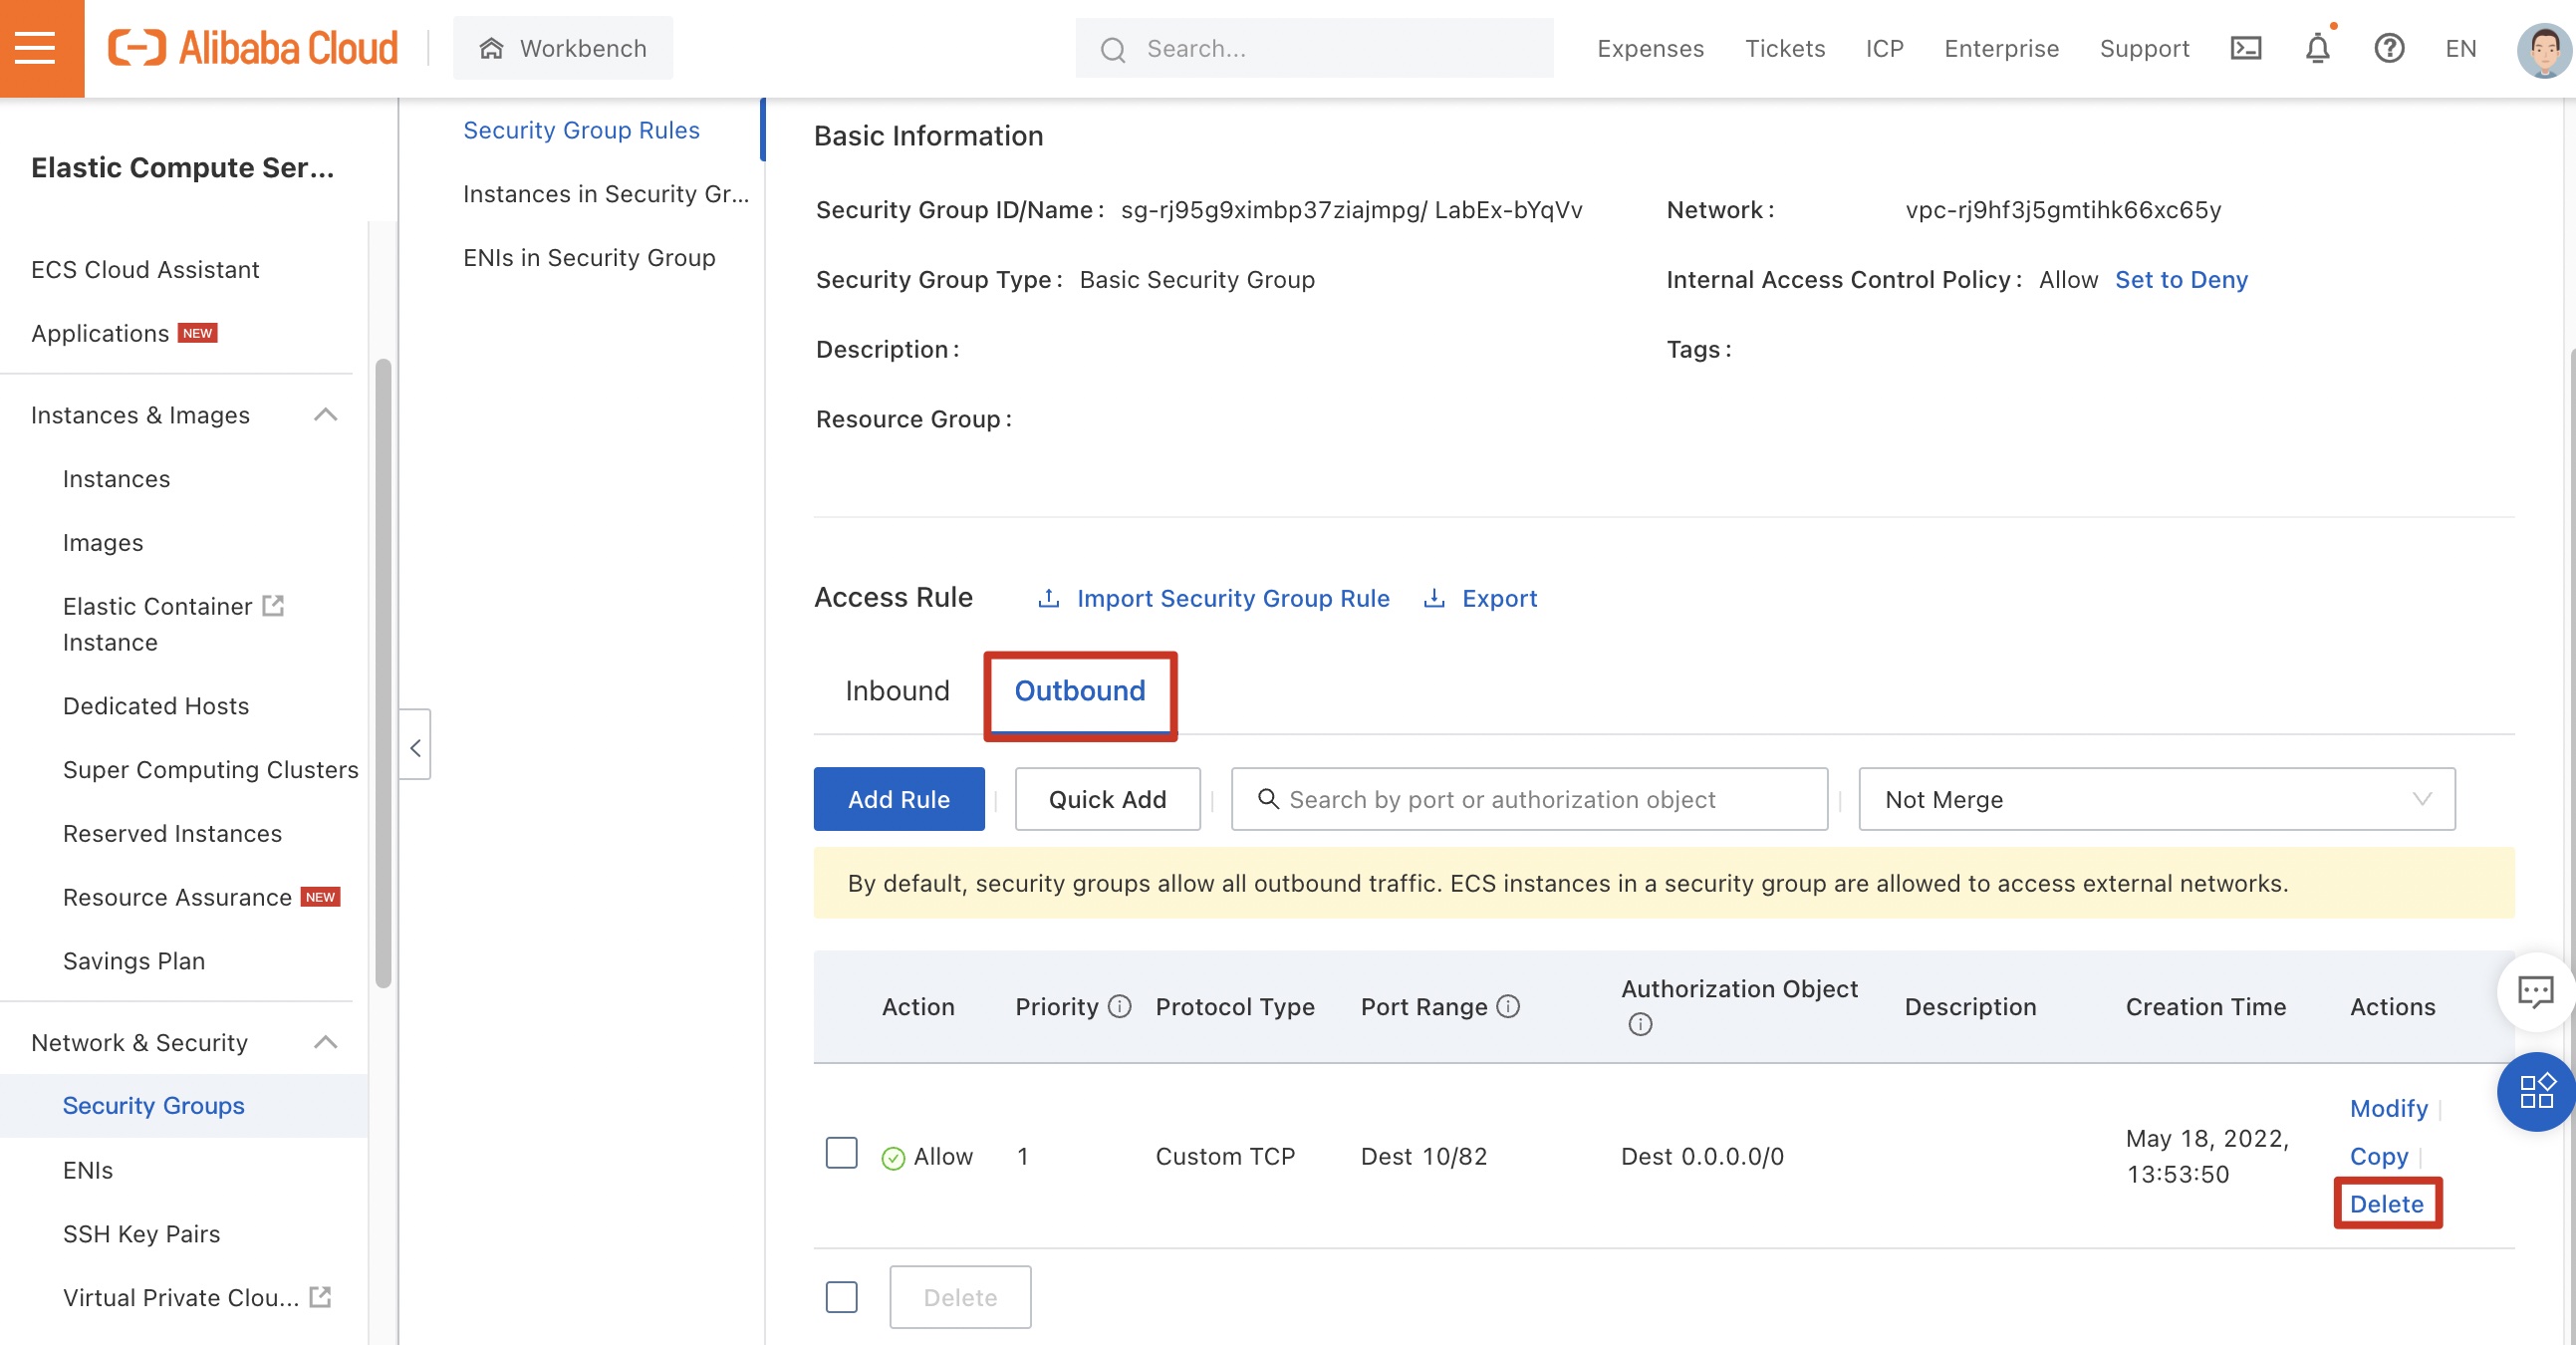
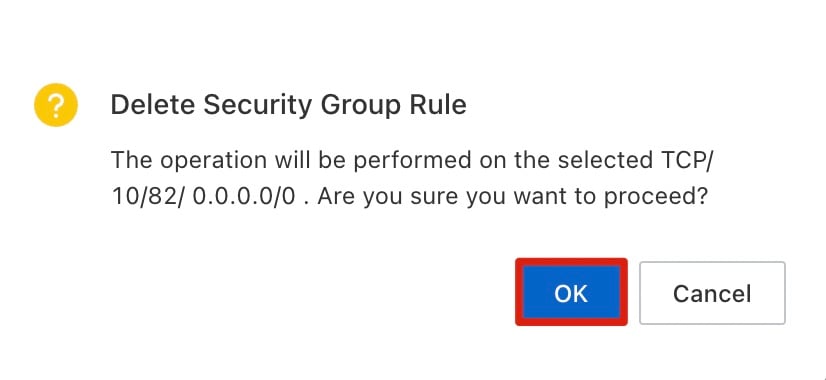
Click Delete to delete the rule and click OK.
Delete the inbound rule in the same way.
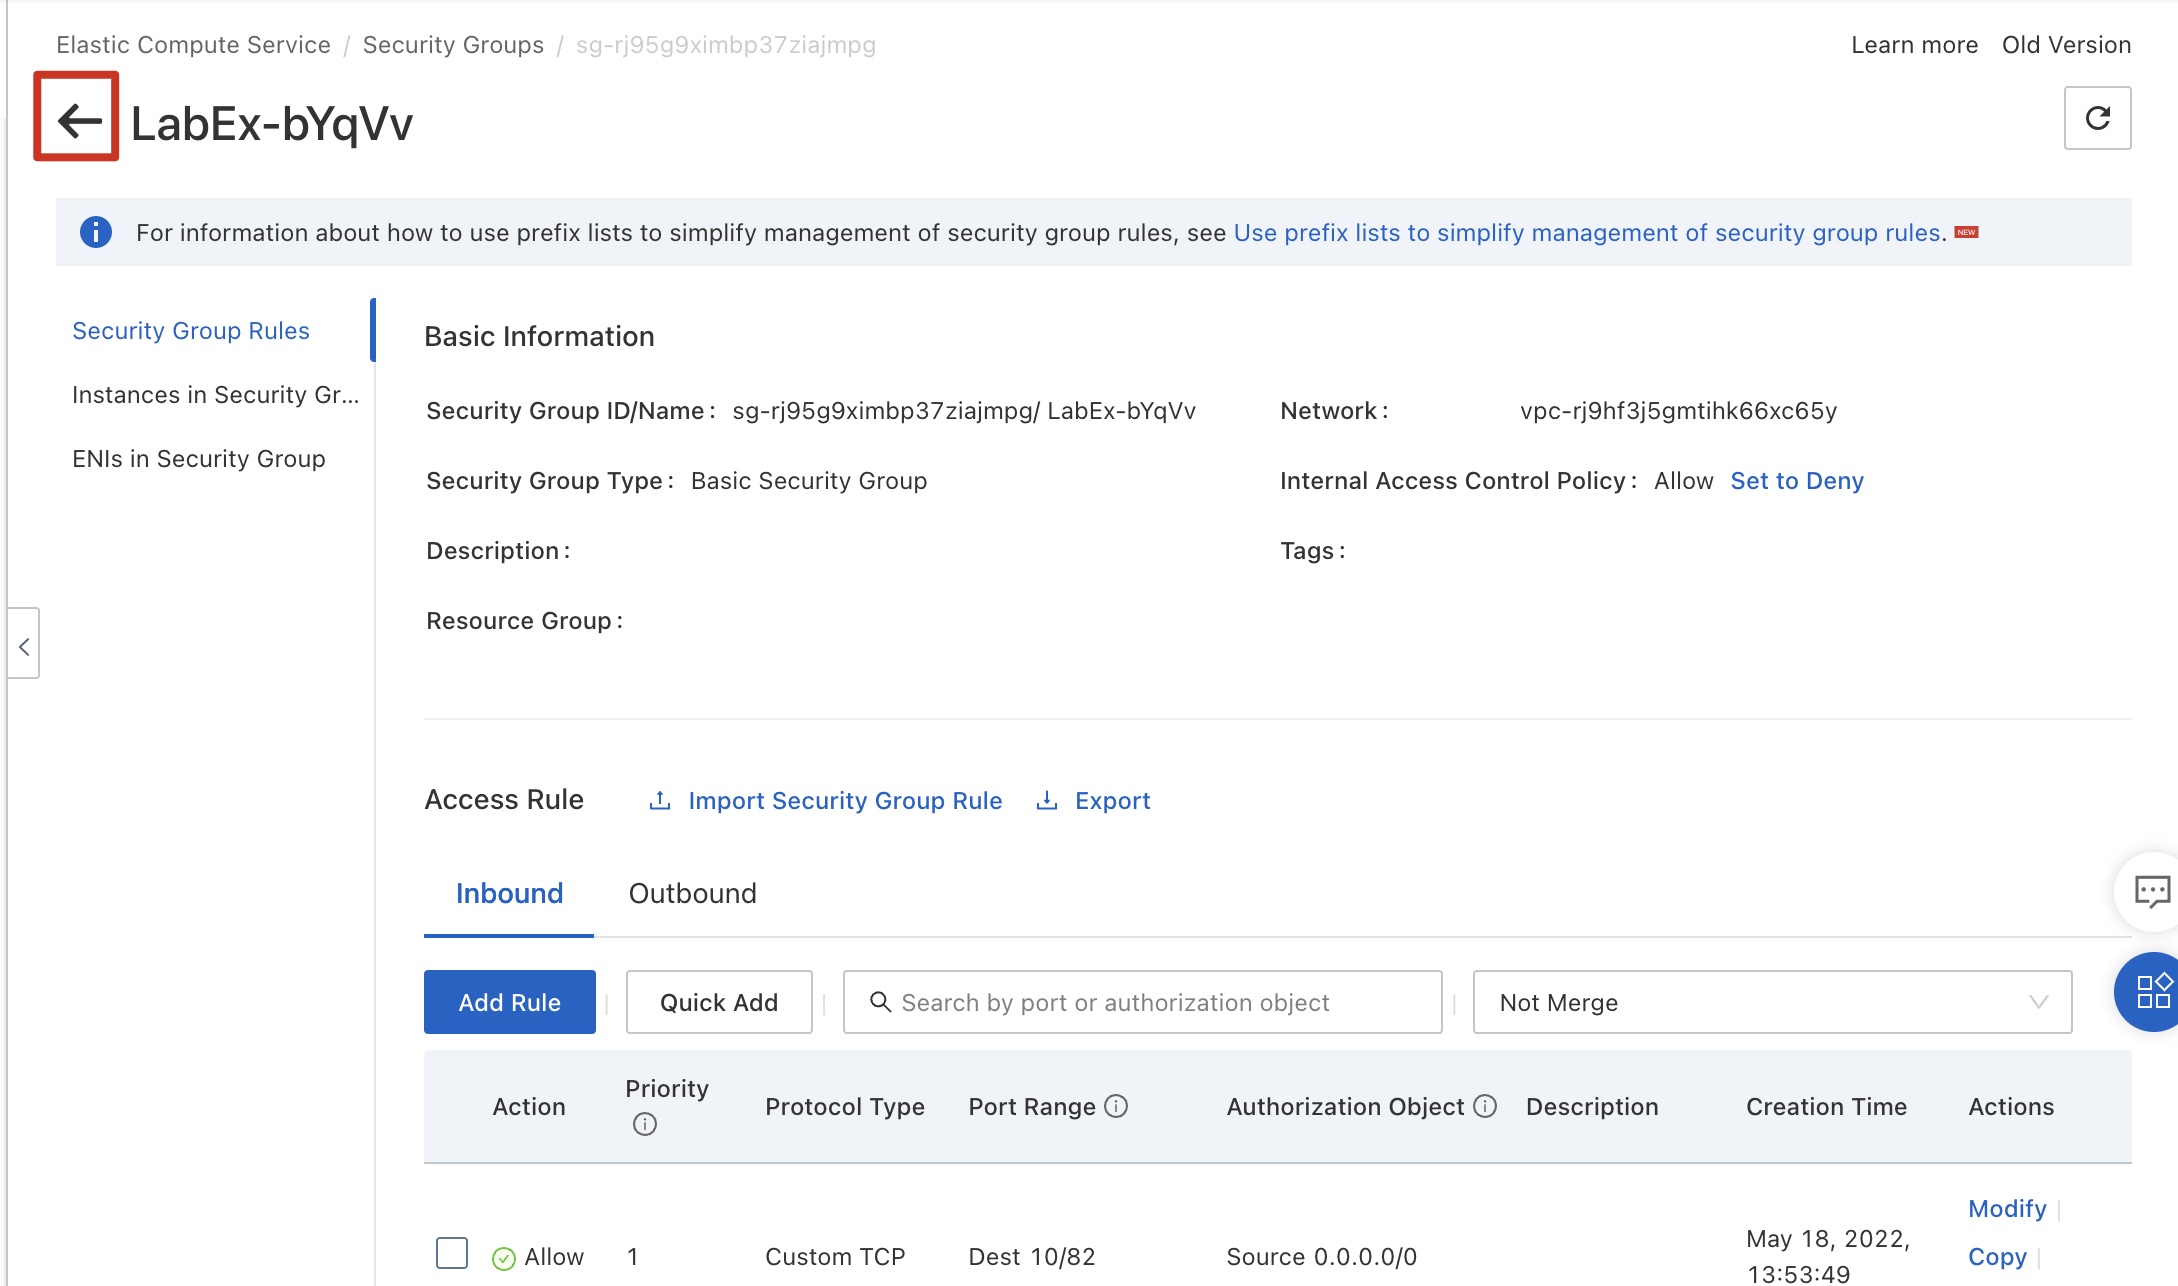
After the rules are deleted, all inbound access to the ECS instances in the security group is forbidden by default. Therefore, external servers cannot connect to any ECS instance in the security group.
4. Ping an ECS instance from the Internet
This section modifies the security group rules to test the ping protocol.
Click the back icon.
Copy the ECS public IP address.
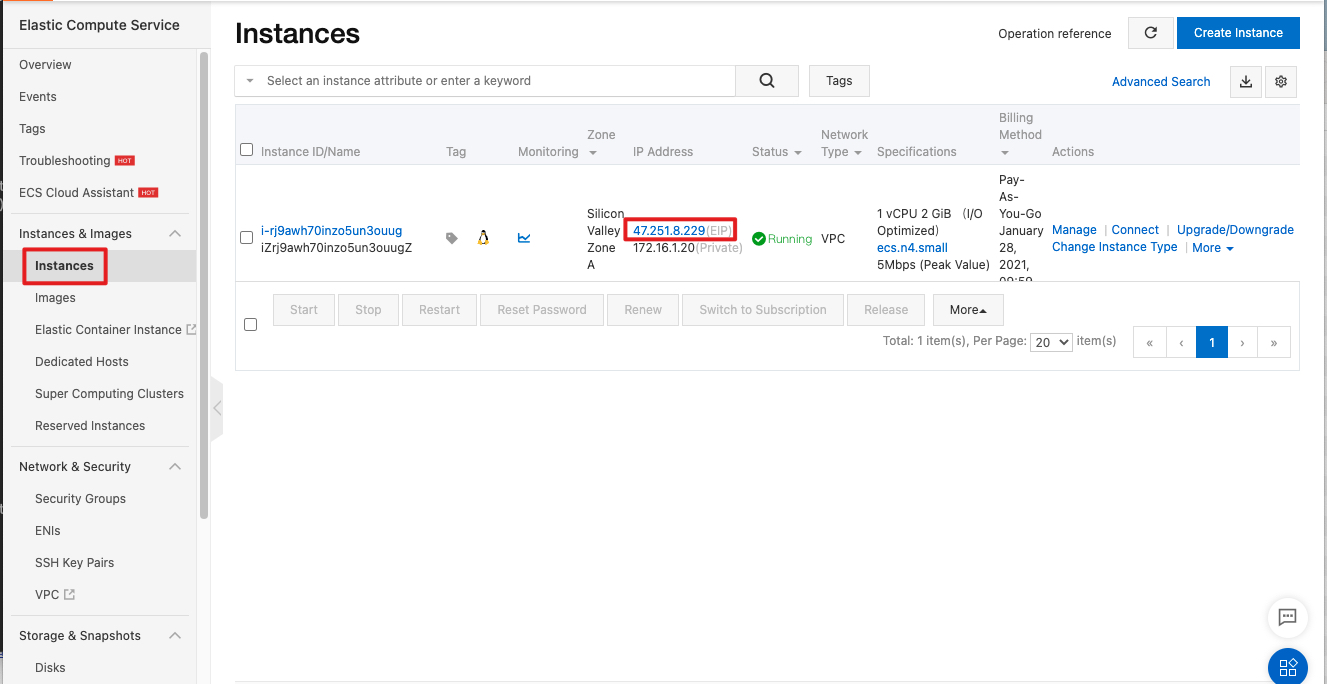
Run the following command in the command line interface (CLI) of the OS. (Replace YOUR-ECS-IP with the public IP address of the ECS.)
For a MAC OS, run the following command:
ping YOUR-ECS-IPFor a Windows OS, run the following command:
ping YOUR-ECS-IP -t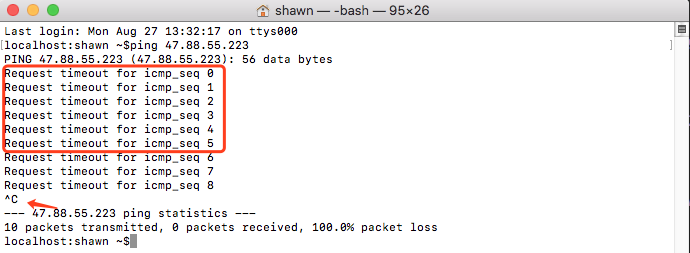
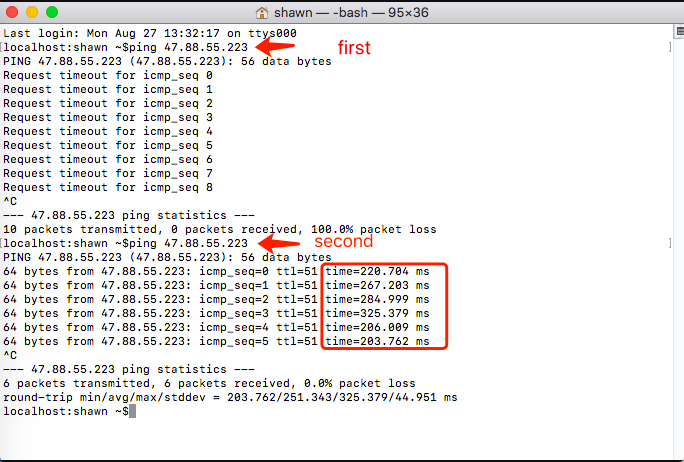
You can see that all connection requests time out, indicating that the ECS instance cannot be pinged.
Press Ctrl+C to stop sending requests.
Return to the security group console, click the Inbound tab, and click Add Rule.
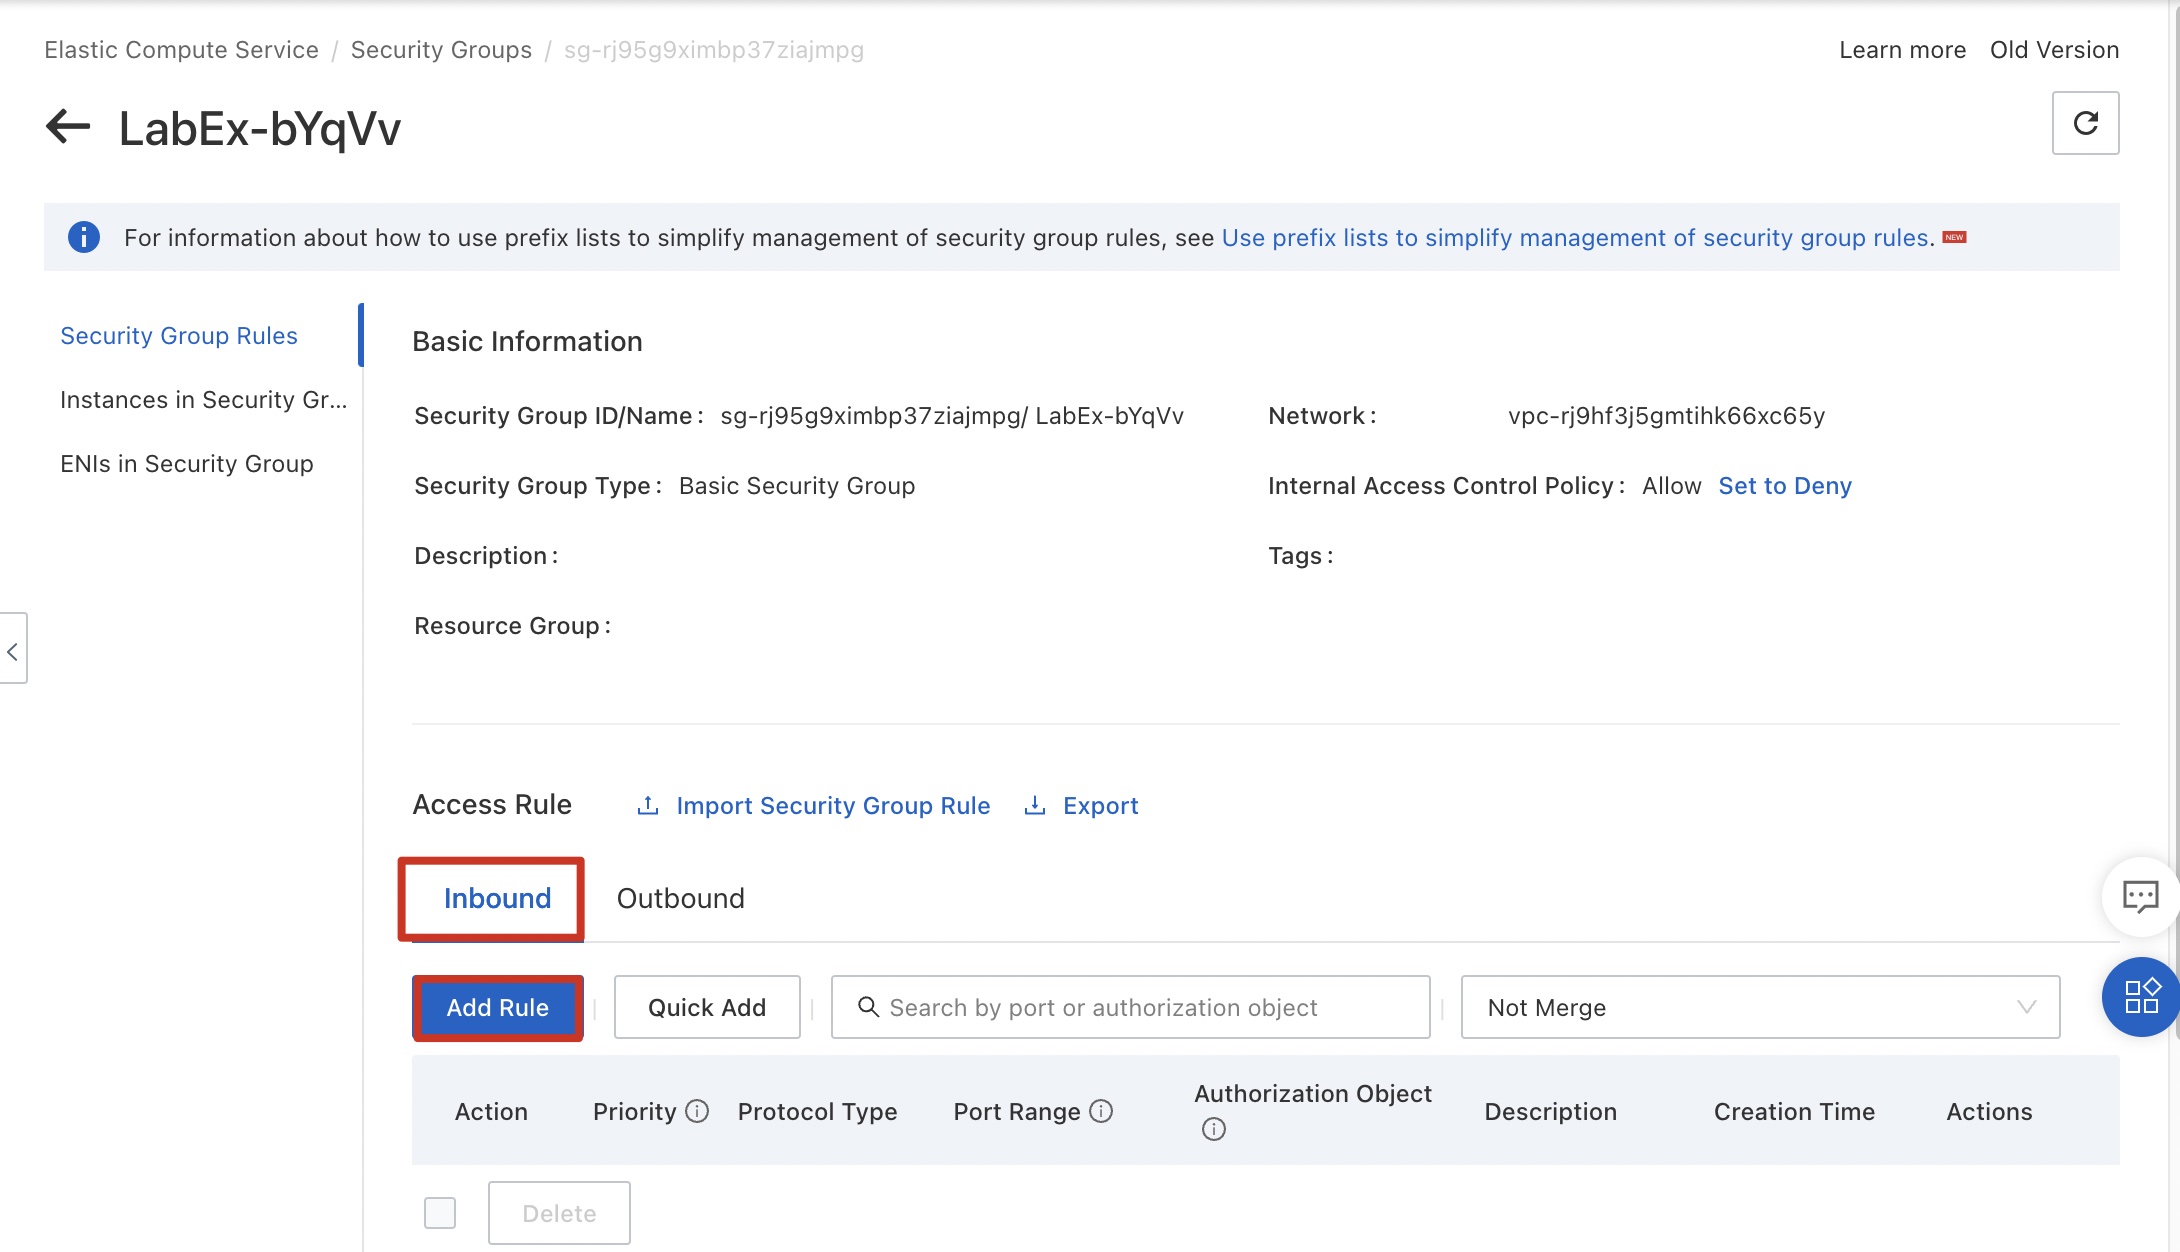
Configure data by referring to the following figure. The rule indicates that all external servers can successfully ping ECS instances in the security group. Because the ping command uses ICMP, select ICMP for Protocol Type. Click Save.
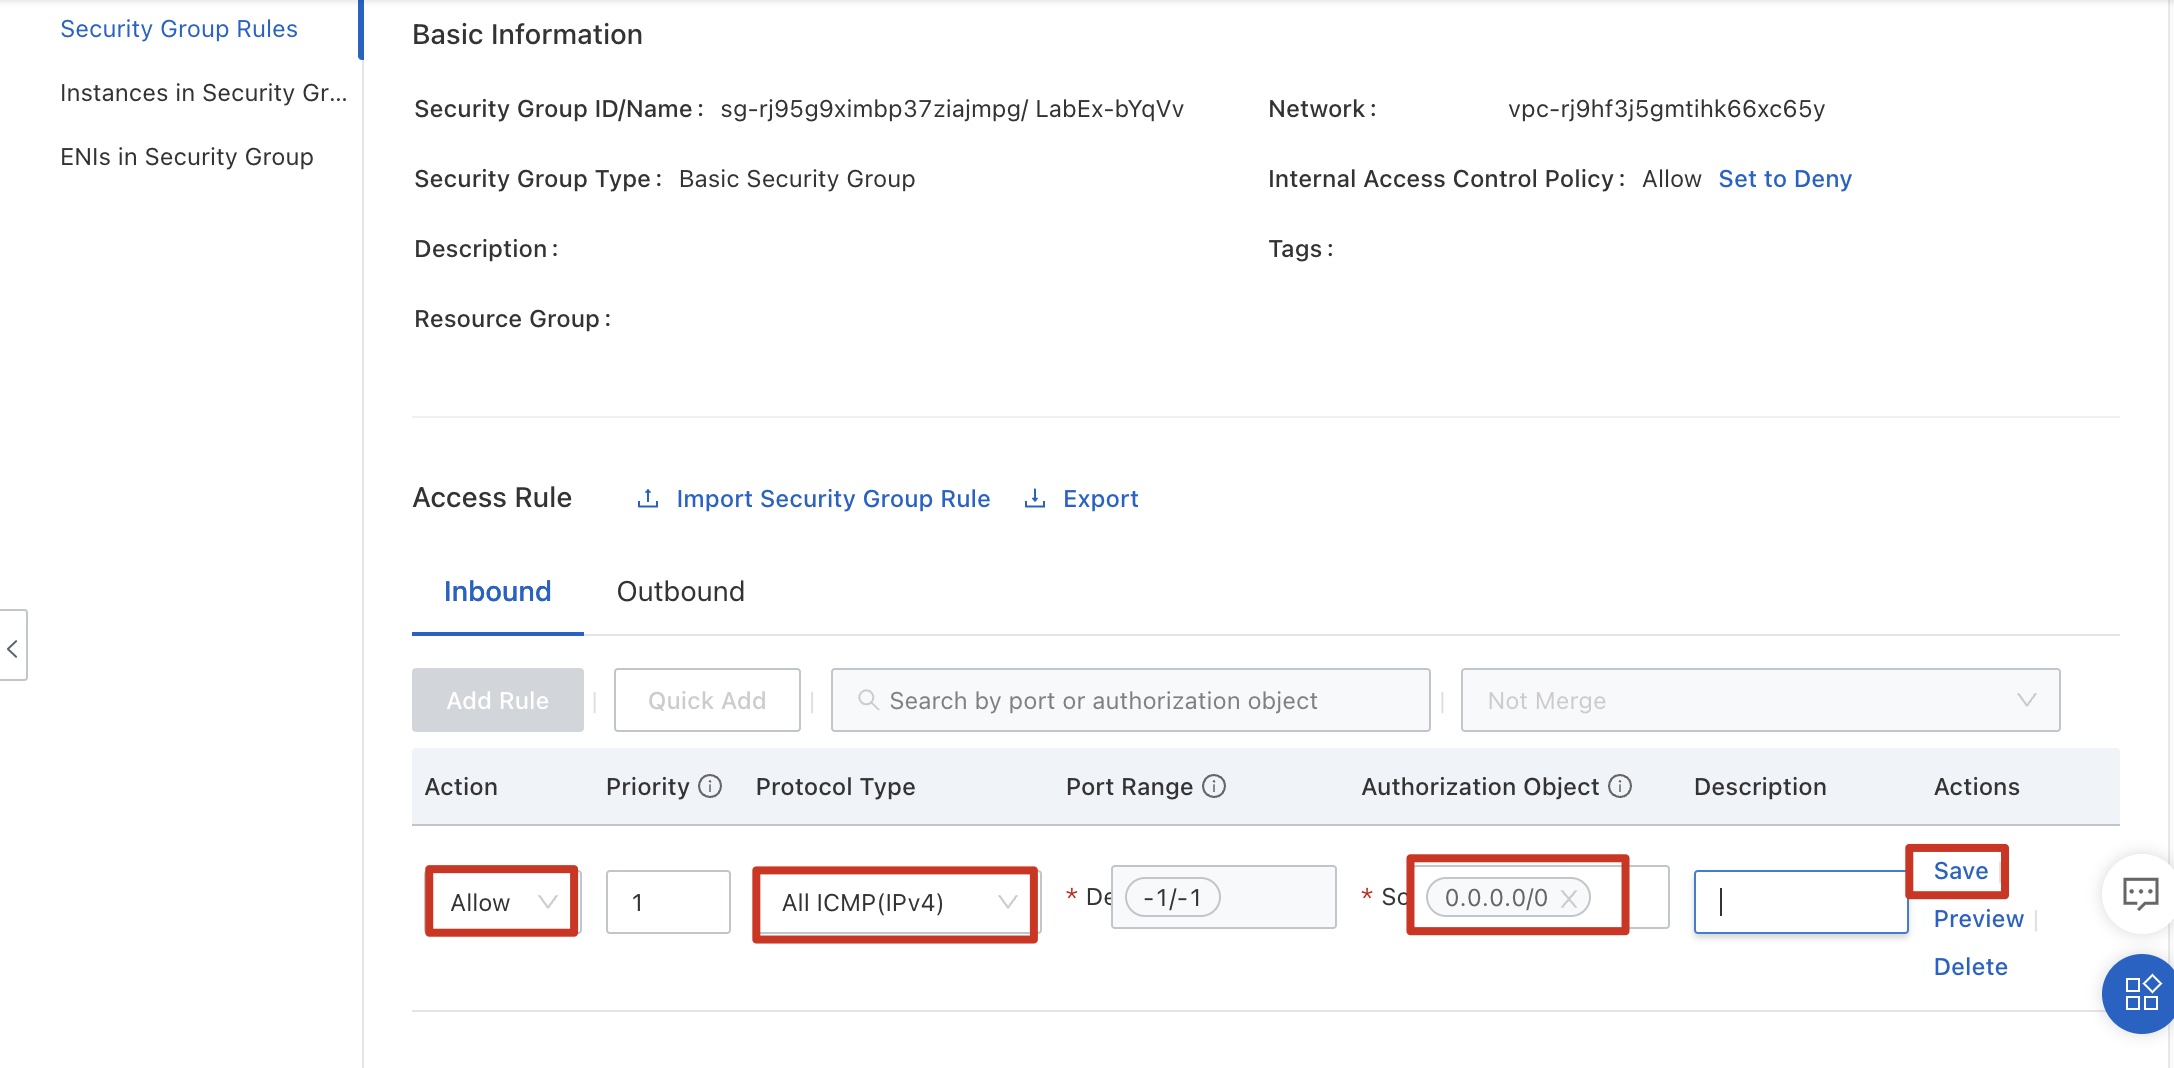
Return to the OS CLI and run the preceding ping command again. The ping request has been successfully replied to.
5. Remotely connect to an ECS instance through SSH
The SSH remote connection mode varies depending on the OS. For more information, visit logon .
The following snapshot uses the MAC OS as an example.
Run the following command to remotely connect to the ECS instance: Replace YOUR-ECS-IP with the ECS IP address.
ssh root@YOUR-ECS-IP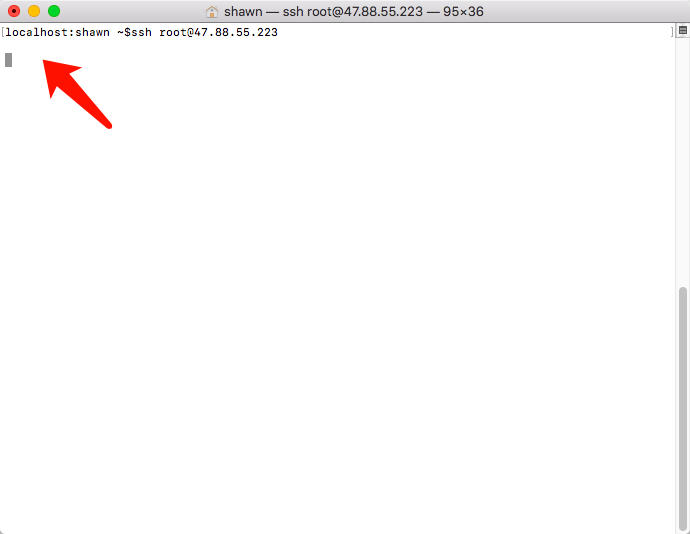
You can see that the command is suspended without any response, indicating that the remote connection to the ECS instance fails.
Press Ctrl+C to stop connecting to the ECS instance.
Return to the security group console, click the Inbound tab, and click Add Rule.
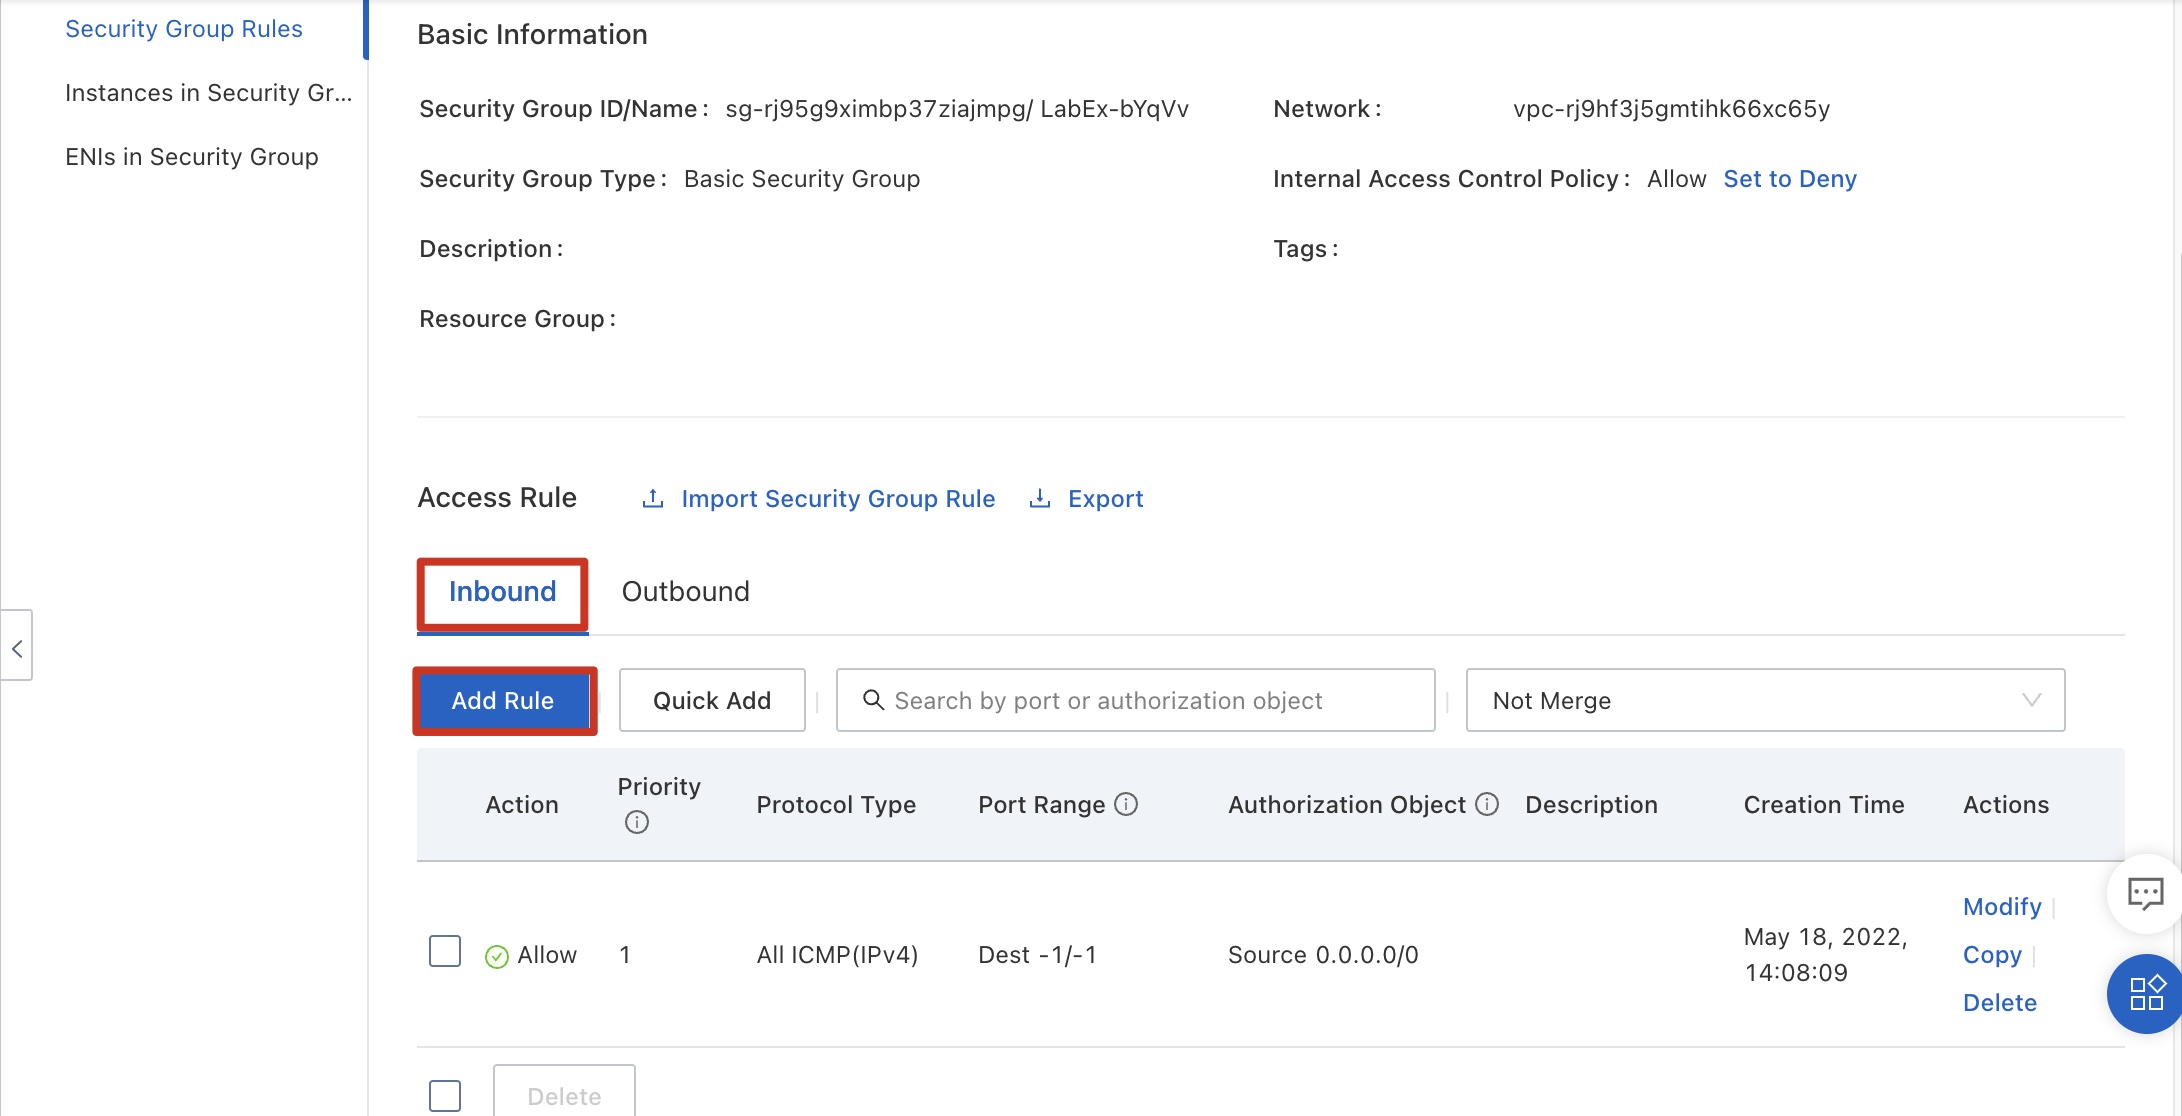
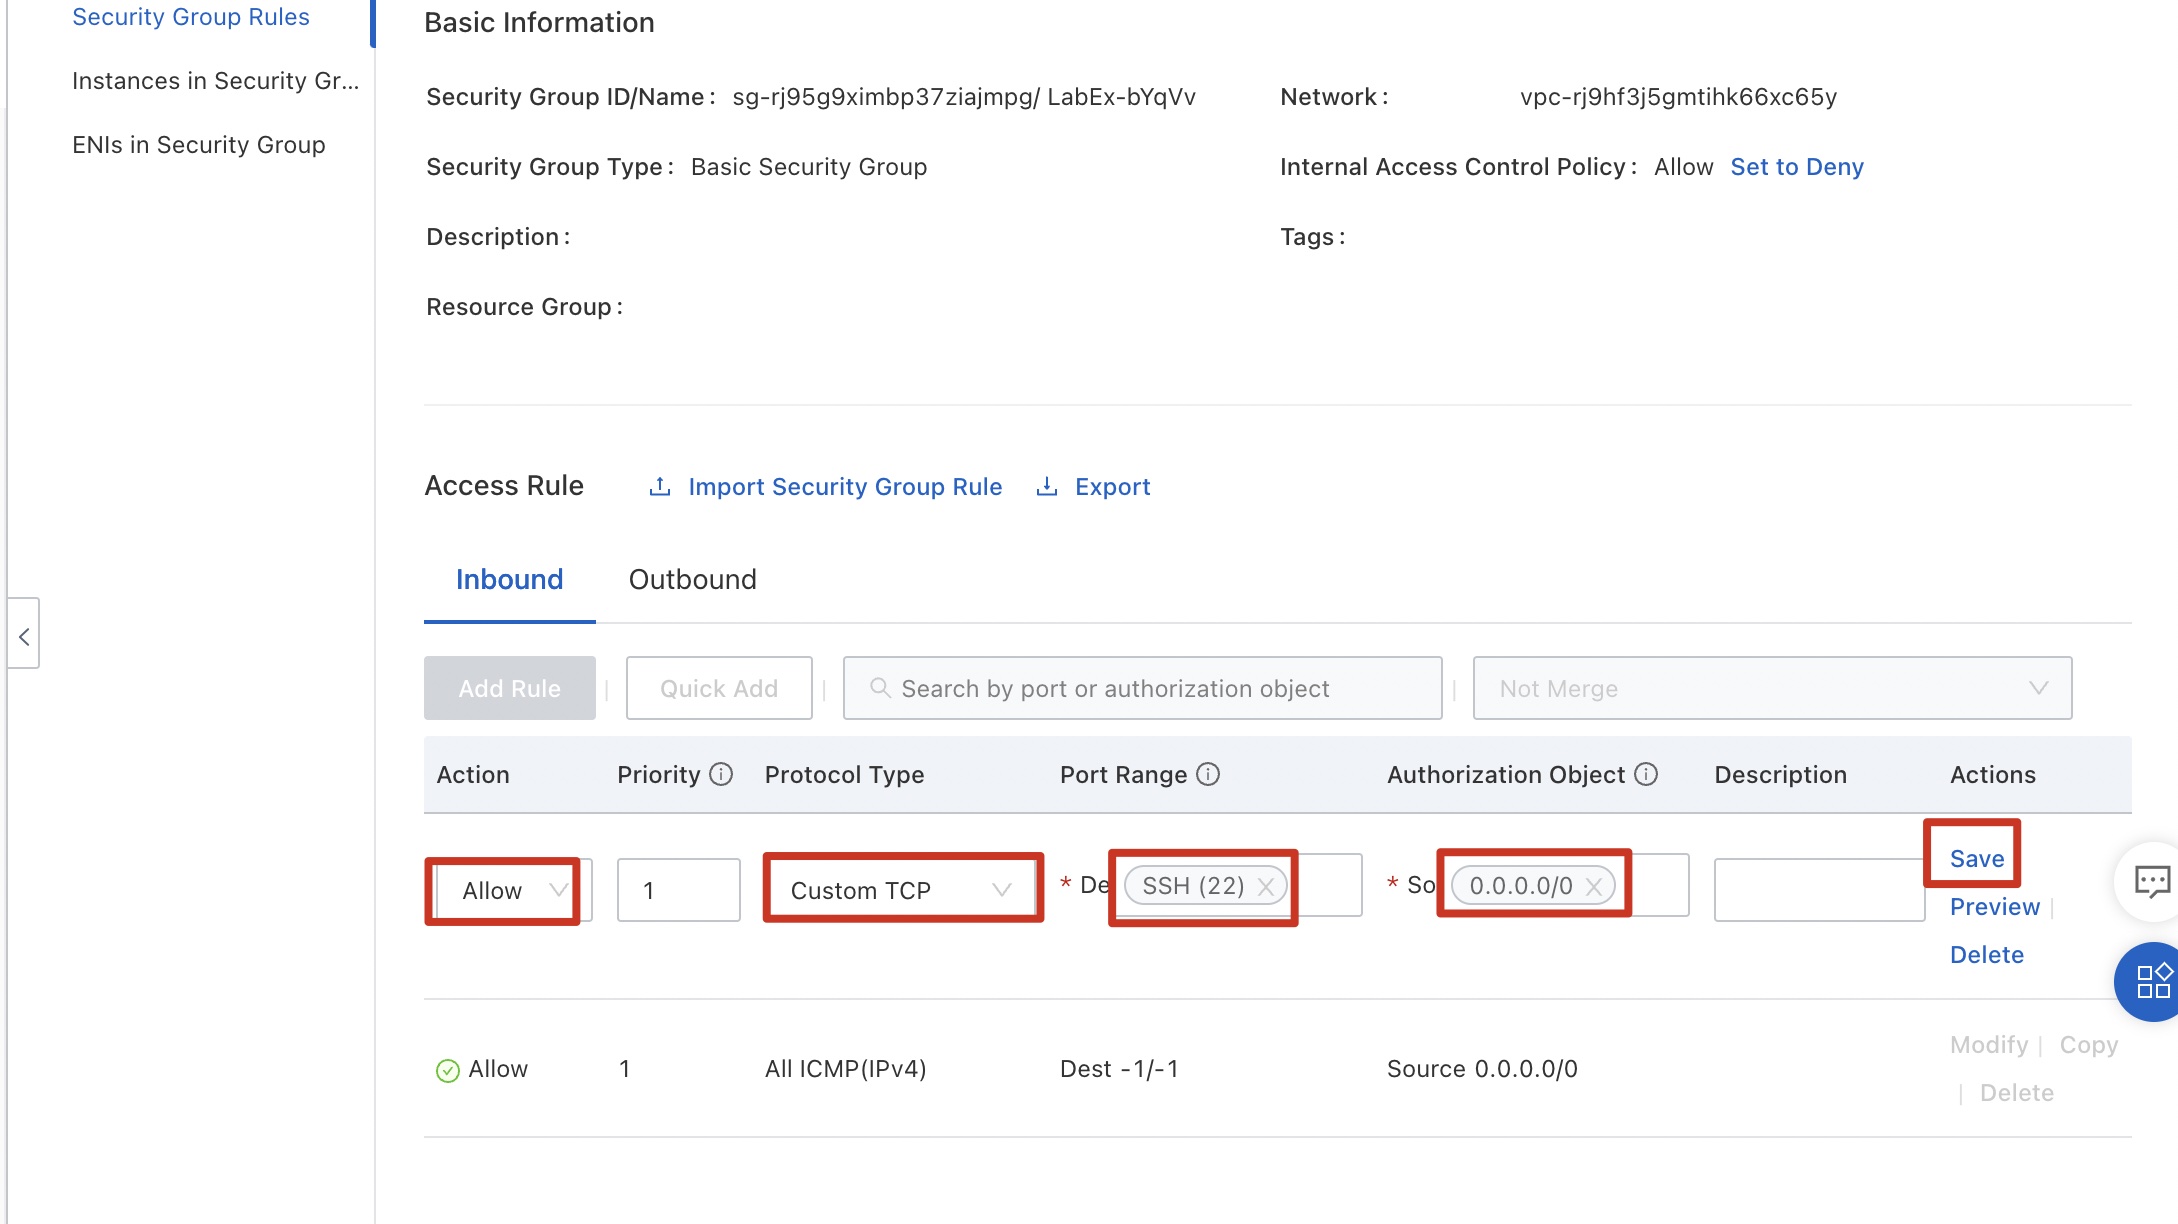
Configure data by referring to the following figure. The rule indicates that servers on any public network can remotely access ECS instances in the security group. Because TCP is used for remote connections, select TCP for Protocol Type. Click OK.
Return to the OS CLI and run the preceding remote connection command again.
Enter yes and the password as prompted. The default password is "nkYHG890..".
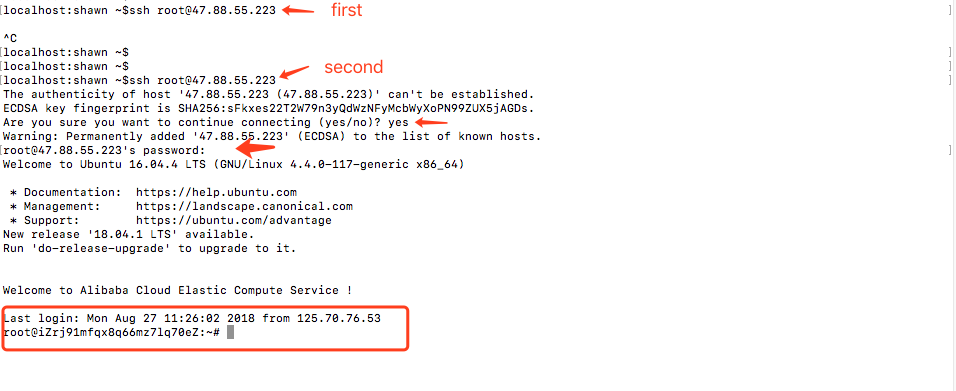
You have successfully logged on to the ECS instance.
6. Use an ECS instance as a web server
After you log on to the ECS instance, install the Nginx service on the ECS instance for external servers to access.
Run the following command to update the apt installation source:
apt update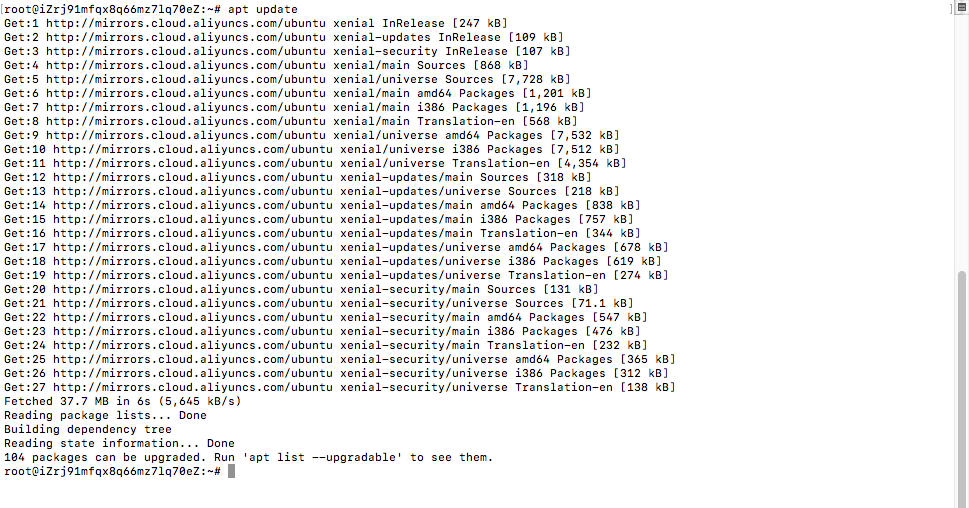
Run the following command to install the Nginx service:
apt -y install nginx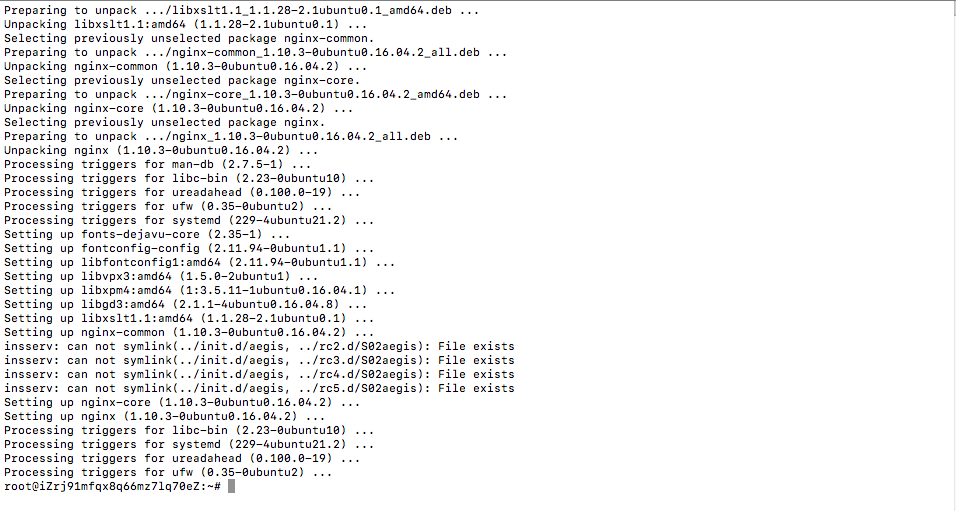
Run the following command to view the Nginx service startup status:
netstat -utnlp
The Nginx service has started and uses port 80 (a common web service port).
Enter the following URL in the address bar of a browser and press Enter to access the Nginx service. Replace YOUR-ECS-IP with the ECS IP address.
http://YOUR-ECS-IP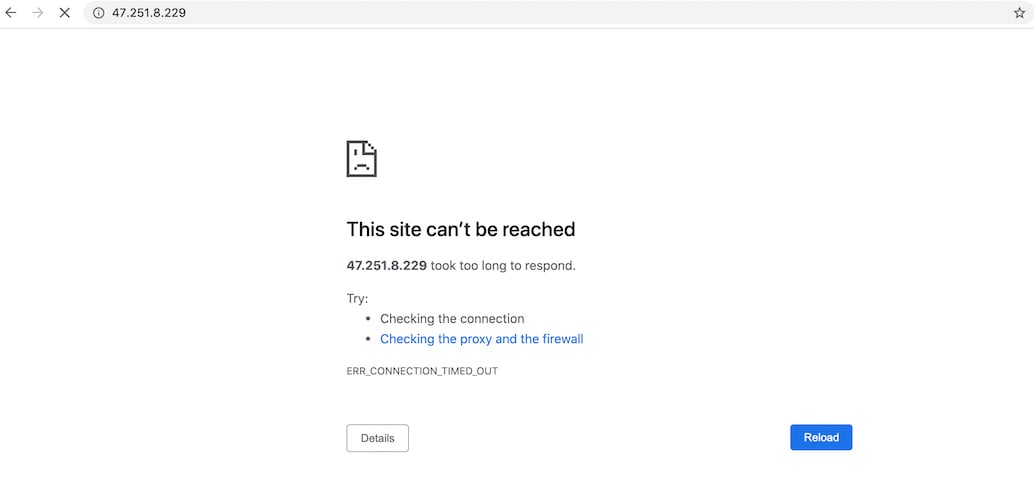
The page is being updated, and the timeout error shown in the preceding figure appears.
Return to the security group console, click the Inbound tab, and click Add Rule.
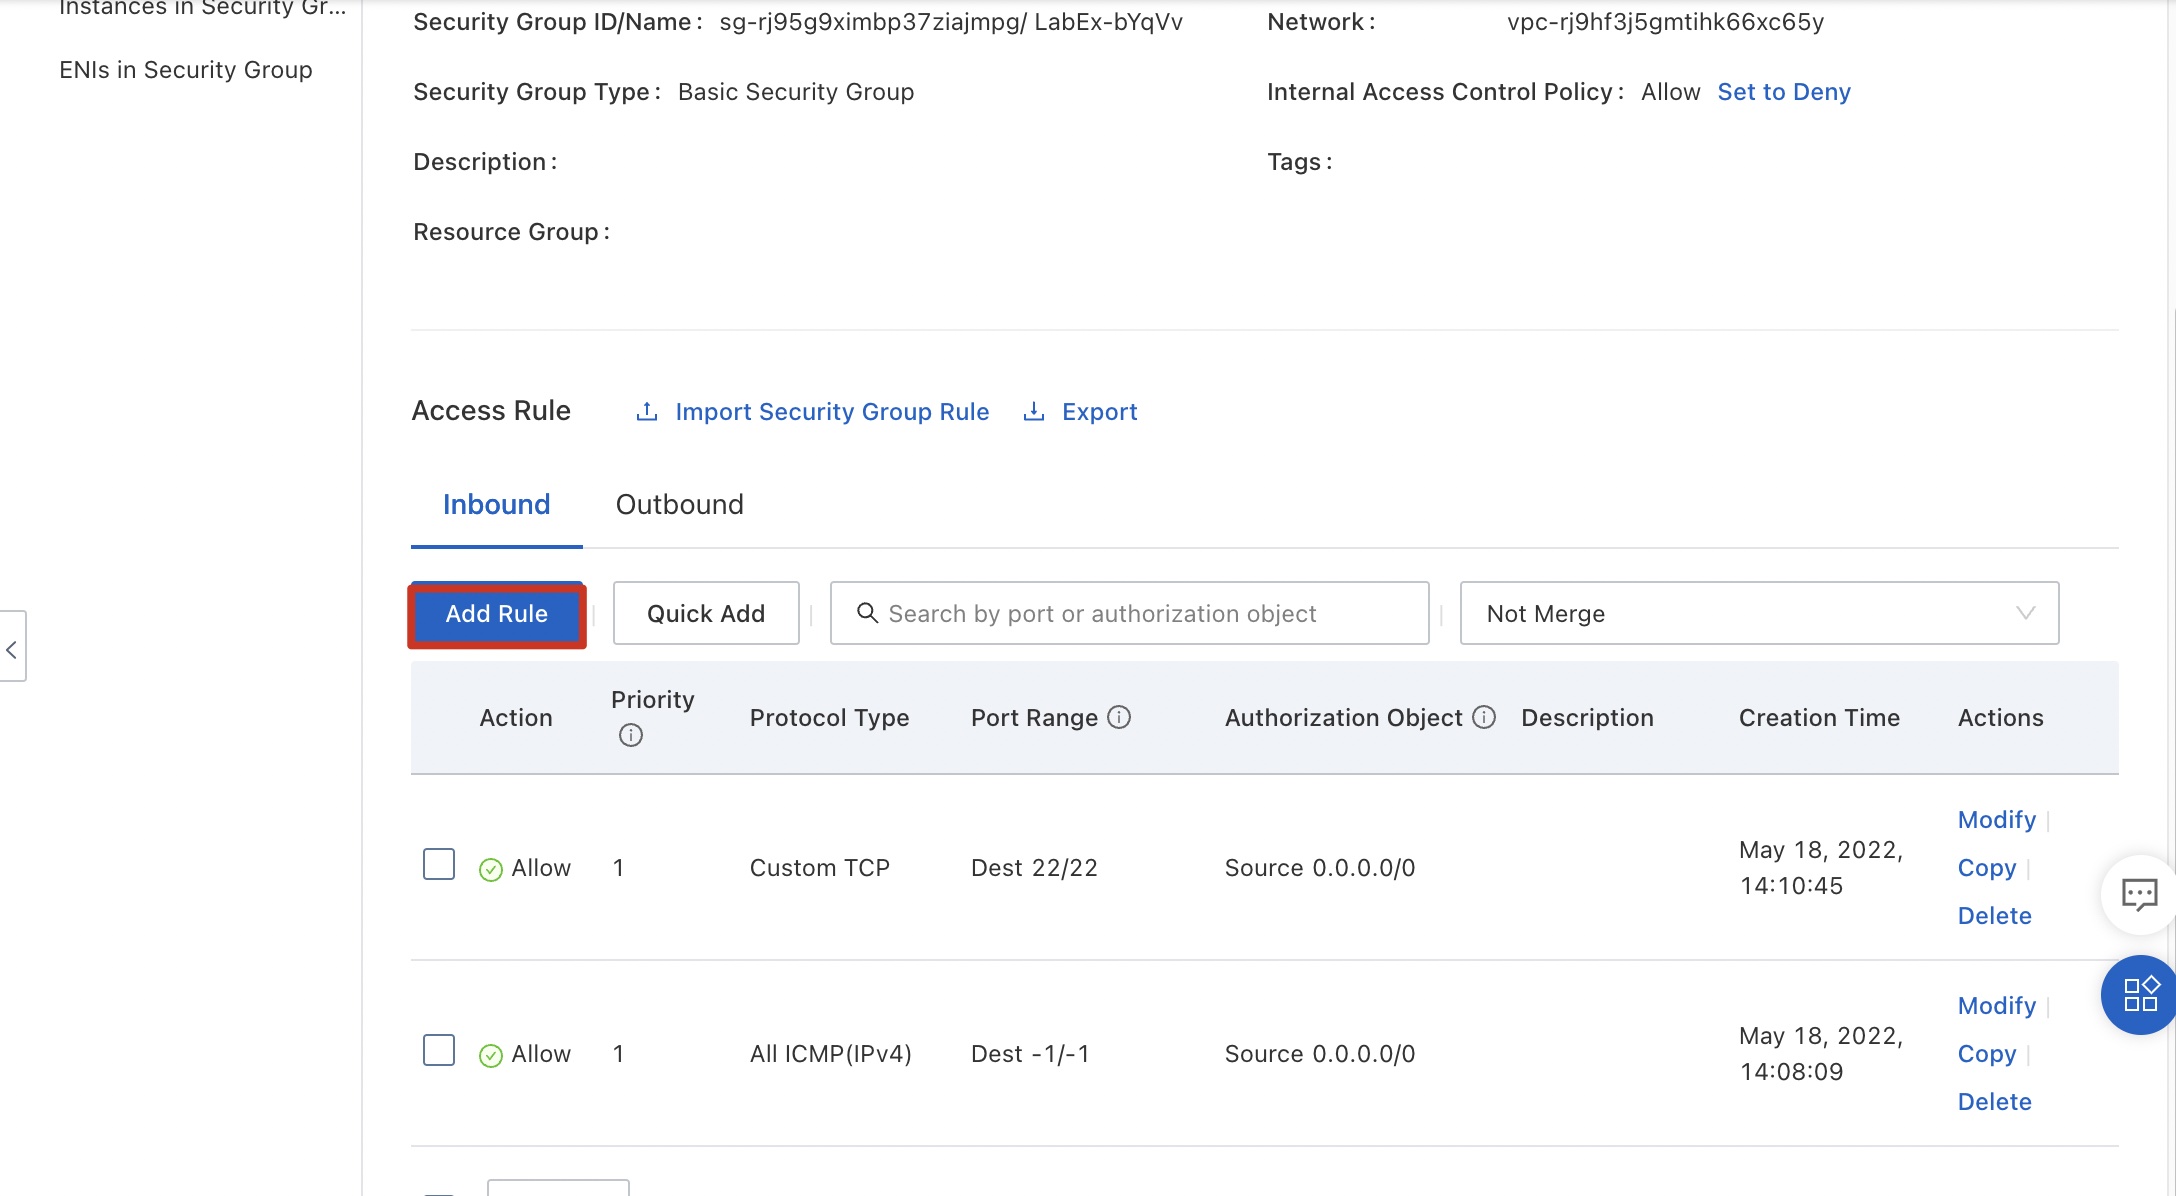
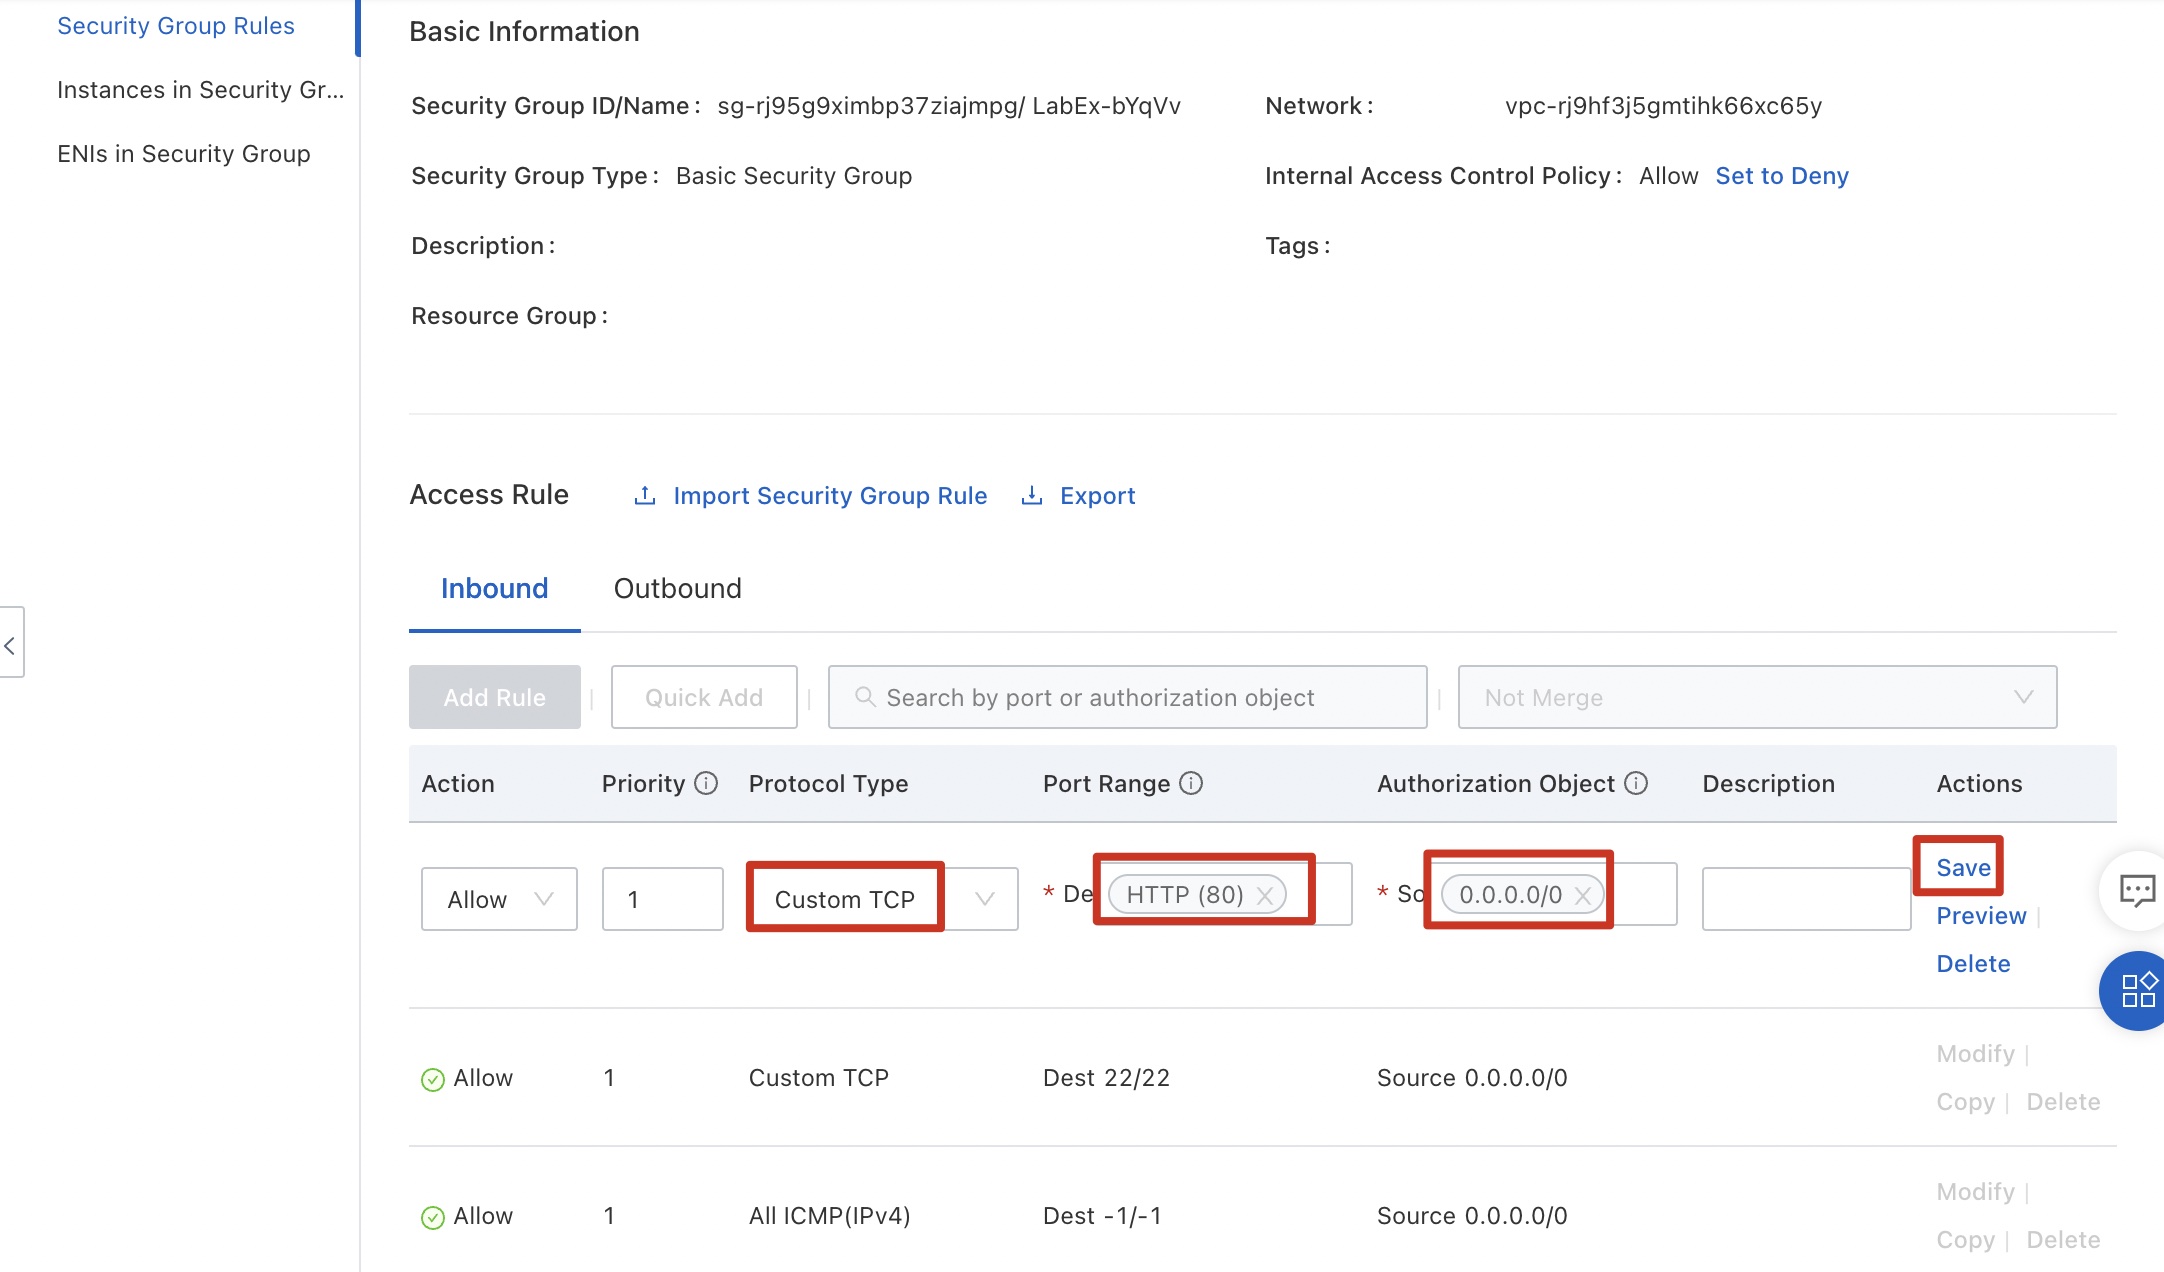
Configure data by referring to the following figure. The rule indicates that servers on any public network can access port 80 of any ECS instance in the security group. Because the web service uses TCP, select TCP for Protocol Type. Click Save.
Update the URL in the address bar of the browser and press Enter. The access to the Nginx service is successful.

Reminder:
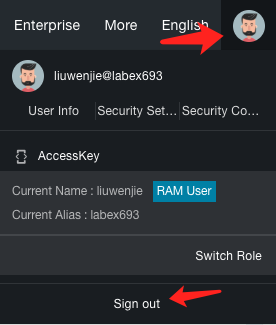
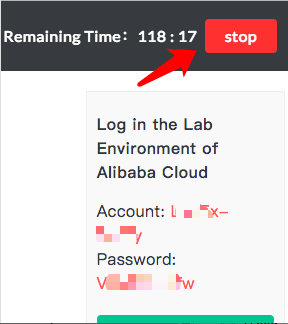
Before you leave this lab, remember to log out your Alibaba RAM account before you click the ‘stop’ button of your lab. Otherwise you'll encounter some issues when opening a new lab session in the same browser:
7. Summary
This lab describes the basic application of Alibaba Cloud ECS security groups. Security group rules control inbound and outbound access to ECS instances associated with a security group on the Internet and intranet. You can configure security group rules based on business requirements to make significant improvements on the security of ECS instances.